一、虚拟机安装
1.vmware下载

2.镜像下载
3.Ubuntu
4.新建虚拟机

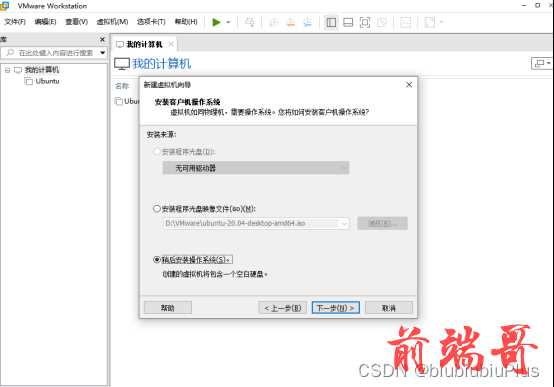
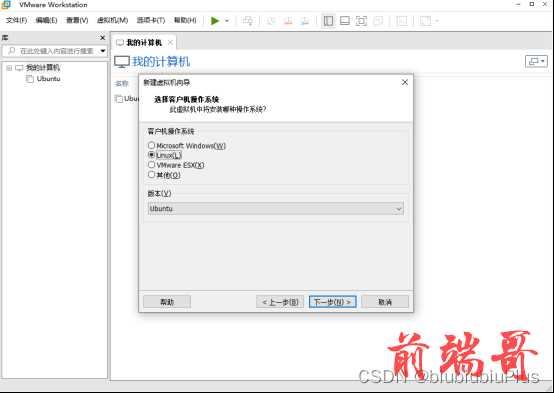
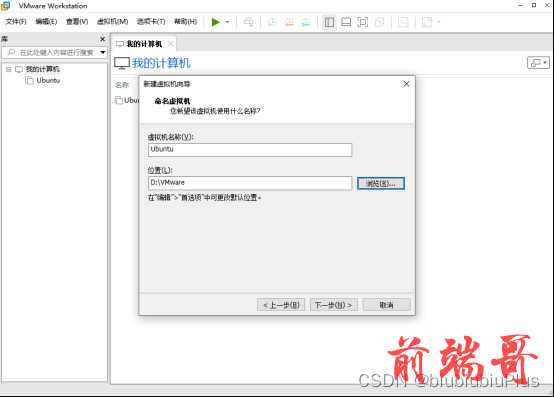
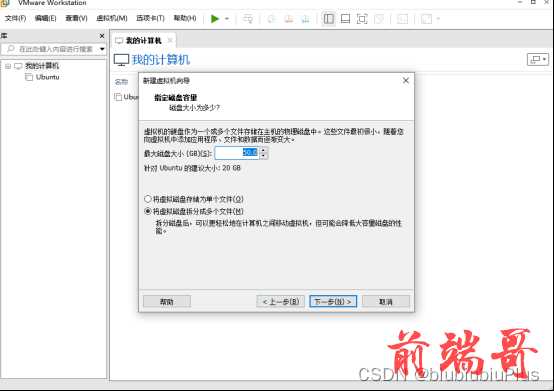
一直点下一步,直到点击完成。
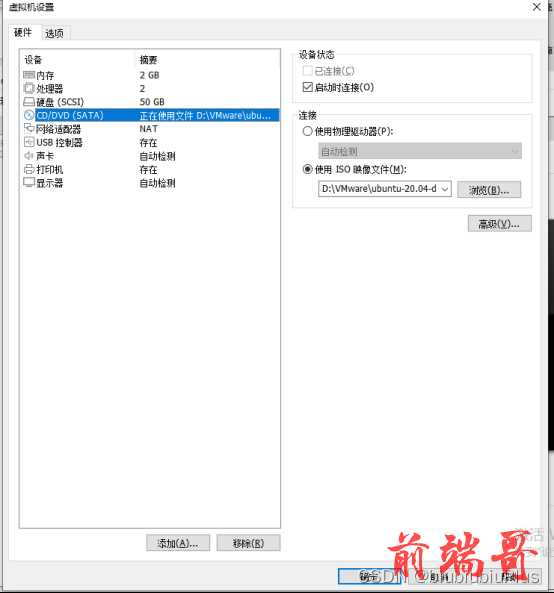
5.分配镜像

二、Gitlab CI/CD 自动化部署项目
1.配置GitLab CI/CD:
A.在你的Vue.js项目中,创建一个名为`.gitlab-ci.yml`的文件,放在项目根目录下。 B.在该文件中定义CI/CD的阶段、作业和脚本。
stages: - build - deploy build: stage: build image: node:14 # 使用Node.js 14.x版本镜像 script: - npm install - npm run build artifacts: paths: - dist/ deploy: stage: deploy script: - 'which ssh-agent || ( apk add --update openssh )' # 安装SSH代理(如果没有的话) - eval $(ssh-agent -s) # 启动SSH代理 - echo "$SSH_PRIVATE_KEY" | tr -d '\r' | ssh-add - # 添加SSH私钥 - ssh -o StrictHostKeyChecking=no user@server 'mkdir -p /path/to/deploy' - scp -r dist/* user@server:/path/to/deploy only: - master #当代码合并到master分支时,该作业才会被执行
#注意:/path/to/deploy这个路径需要给写入文件的权限,否则部署会失败 sudo chmod o+w /path/to/deploy
2.生成SSH密钥对:
如果尚未生成,请在本地机器上生成一个SSH密钥对:
ssh-keygen -t rsa -b 4096 -f \~/.ssh/id_rsa_vue_deploy
将公钥(\~/.ssh/id_rsa_vue_deploy.pub)添加到服务器的授权密钥中。
3.将SSH私钥添加到GitLab:
进入GitLab中的项目页面。 转到 "设置" > "CI / CD",展开 "变量" 部分。 添加一个名为 SSH_PRIVATE_KEY 的变量,并将 \~/.ssh/id_rsa_vue_deploy 文件的内容粘贴到值中。
4.更新GitLab CI/CD配置:
更新 .gitlab-ci.yml 文件,引用正确的私钥变量:
deploy: stage: deploy script: - 'which ssh-agent || ( apk add --update openssh )' - eval $(ssh-agent -s) - echo "$SSH_PRIVATE_KEY" | tr -d '\r' | ssh-add - - ssh -o StrictHostKeyChecking=no -i \~/.ssh/id_rsa_vue_deploy user@server 'mkdir -p /path/to/deploy' - scp -r dist/* -i \~/.ssh/id_rsa_vue_deploy user@server:/path/to/deploy only: - master
5.提交和推送更改:
将更改提交到你的项目并推送到GitLab。 现在,每当你将更改推送到 master 分支时,GitLab CI/CD将自动触发构建和部署阶段,将Vue.js项目部署到指定的服务器上。确保根据你的具体服务器详情和要求调整配置。
三、给虚拟机配置ssh服务端
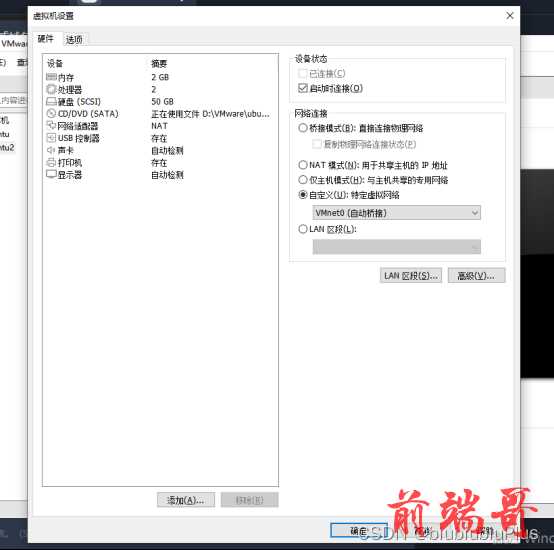
1.虚拟机的网络适配器选择 桥接模式
2.在虚拟机上安装SSH服务器
sudo apt update sudo apt install openssh-server
3.本地生成SSH密钥对
ssh-keygen

4.本地将公钥(~/.ssh/id_rsa_vue_deploy.pub)添加到服务器的授权密钥中
ssh-copy-id user@server_ip

5.本地测试SSH连接:
ssh user@server_ip
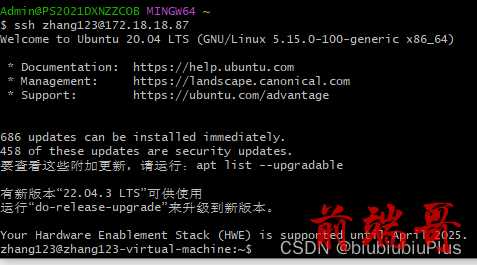
6.设置CI/CD变量–值为私钥

四、GitLab Runner安装与注册
1.添加GitLab官方存储库:
curl -L https://packages.gitlab.com/install/repositories/runner/gitlab-runner/script.deb.sh | sudo bash
2.安装GitLab Runner
sudo apt update sudo apt install gitlab-runner
3.注册Runner
sudo gitlab-runner register
4.输入您的GitLab实例URL
Please enter the gitlab-ci coordinator URL (e.g. https://gitlab.com ) https://gitlab.com
5.输入您获得的令牌以注册Runner
Please enter the gitlab-ci token for this runner: xxx

6.输入对这个Runner的描述
Please enter the gitlab-ci description for this runner test
7.输入Runner的tag
Please enter the gitlab-ci tags for this runner (comma separated): test
8.输入Runner执行程序
Please enter the executor: ssh, docker+machine, docker-ssh+machine, kubernetes, docker, parallels, virtualbox, docker-ssh, shell: shell

9.服务端安装nodejs
//使用NodeSource存储库安装Node.j curl -fsSL https://deb.nodesource.com/setup_14.x | sudo -E bash - //安装Node.js sudo apt update sudo apt install -y nodejs //验证安装 node -v npm -v
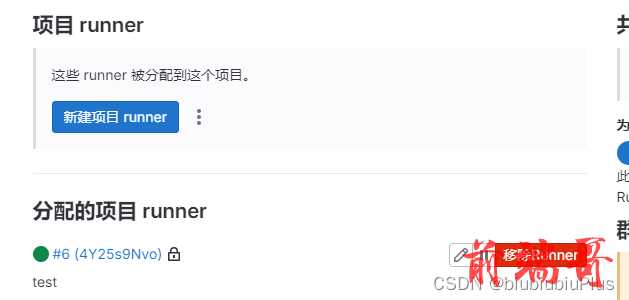
10.在gitlab上查看runner和流水线

五、配置nginx
1.安装nginx
sudo apt install nginx //验证安装:在浏览器中输入 http://localhost 或 http://127.0.0.1
2.在/etc/nginx/conf.d目录下,新增nginx配置文件
server { listen 80; # 域名,多个以空格分开 server_name 172.18.18.87; location / { root /path/to/deploy/dist; index index.html index.htm; } }
六、视频可参考
七、彩蛋(直接部署到线上服务器的全流程思维导图,结构更清晰)

