目录
一、登陆注册实现思路
二、实现具体步骤
1. 设计数据库表结构
2. 创建Spring Boot项目
3. 编写实体类
4. 编写Repository接口
5. 编写Service层
6. 创建Controller
7. 编写前端页面
Register.html:
login.html:
8.进行测试登陆注册模块
三、总结
博主介绍:✌专注于前后端领域开发的优质创作者、秉着互联网精神开源贡献精神,答疑解惑、坚持优质作品共享。本人是掘金/腾讯云/阿里云等平台优质作者、擅长前后端项目开发和毕业项目实战,深受全网粉丝喜爱与支持✌有需要可以联系作者我哦!
🍅文末三连哦🍅
👇🏻 精彩专栏推荐订阅👇🏻 不然下次找不到哟
一、登陆注册实现思路
实现登录和注册功能可以分为以下几个步骤:
-
设计数据库表结构:首先,你需要设计用户表,包含用户名、密码等字段。你也可以考虑使用加密算法存储密码,比如BCrypt。
-
创建Spring Boot项目:使用Spring Initializr创建一个新的Spring Boot项目,并添加相应的依赖,比如Spring Web、Spring Data JPA等。
-
编写实体类:根据数据库表结构,在Java中创建相应的实体类,用于映射数据库表。
-
编写Repository接口:创建一个Repository接口,用于执行数据库操作,比如查询用户信息、保存用户信息等。
-
编写Service层:创建一个Service层,包含业务逻辑,比如验证用户登录、注册新用户等。在这个层次你可以加入密码加密、验证等逻辑。
-
创建Controller:创建Controller来处理用户的登录和注册请求。Controller接收请求参数,调用Service层方法完成相应的业务逻辑。
-
编写前端页面:创建HTML页面用于用户登录和注册。可以使用表单来收集用户信息,并通过Ajax或者普通的表单提交来发送数据到后端。
-
测试和调试:在完成上述步骤后,进行测试和调试,确保功能的正常运行。

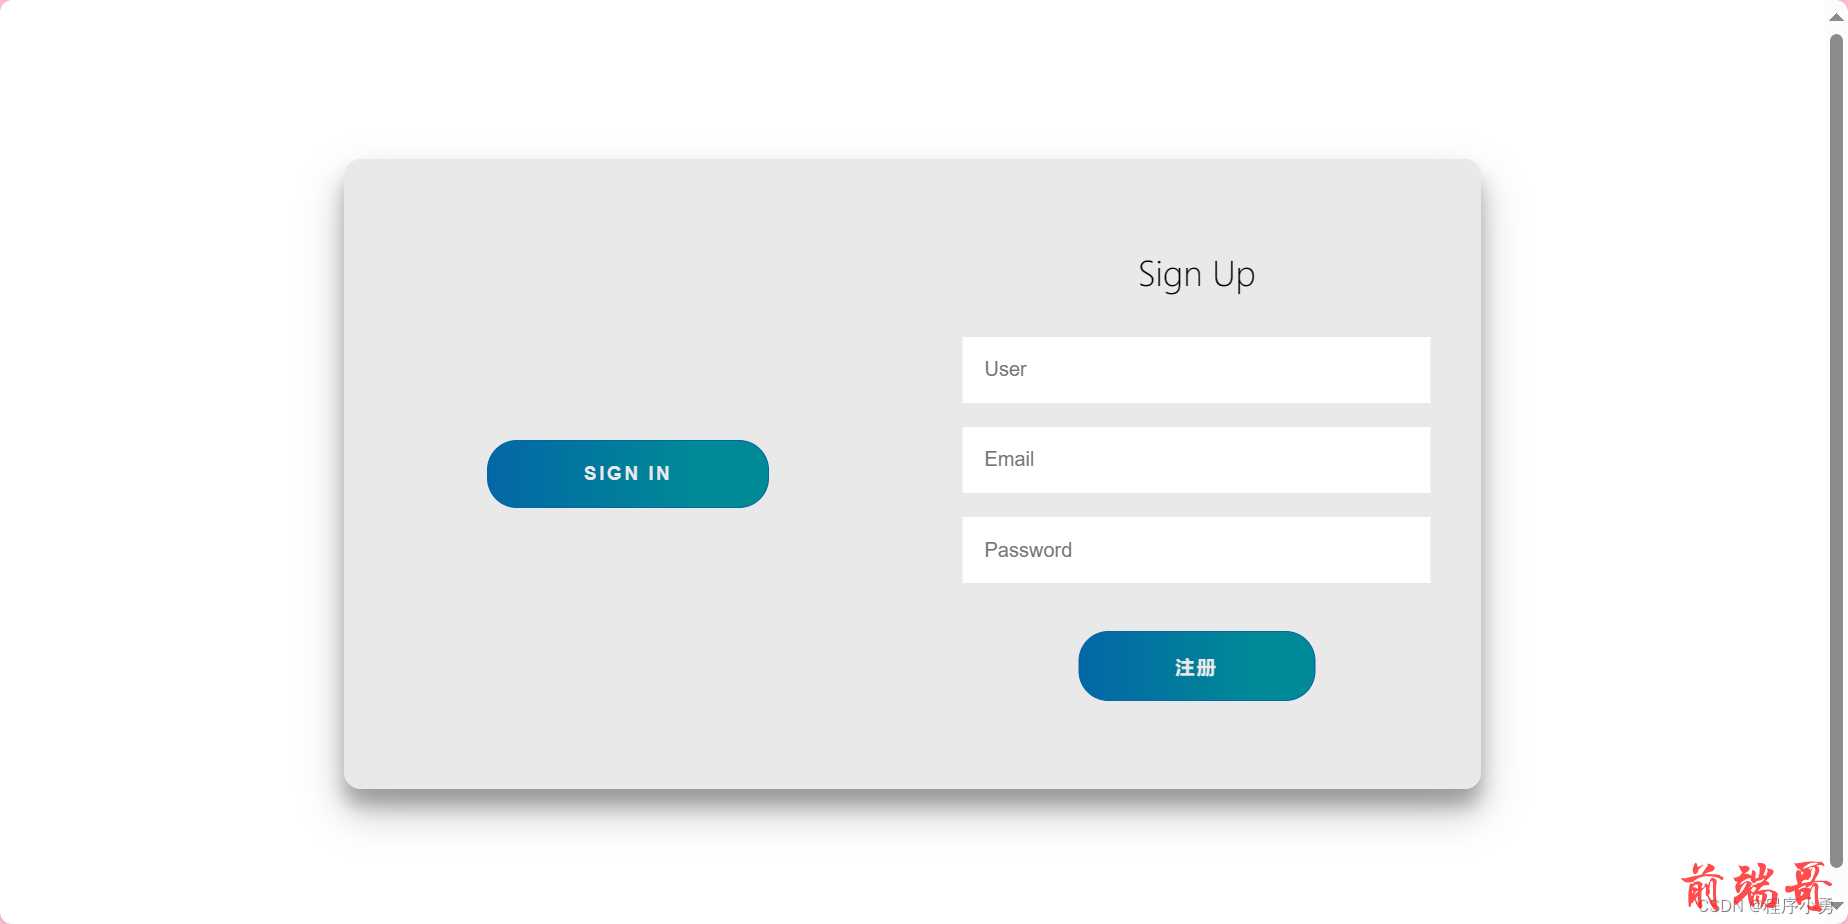
登录页面

注册页面

运行页面截图
二、实现具体步骤
1. 设计数据库表结构
CREATE TABLE user ( id INT AUTO_INCREMENT PRIMARY KEY, username VARCHAR(255) NOT NULL, password VARCHAR(255) NOT NULL );
2. 创建Spring Boot项目
使用Spring Initializr创建一个新的Spring Boot项目,添加Spring Web和Spring Data JPA依赖。
3. 编写实体类
import javax.persistence.Entity; import javax.persistence.GeneratedValue; import javax.persistence.GenerationType; import javax.persistence.Id; @Entity public class User { @Id @GeneratedValue(strategy = GenerationType.IDENTITY) private Long id; private String username; private String password; // Getters and setters }
4. 编写Repository接口
import org.springframework.data.jpa.repository.JpaRepository; public interface UserRepository extends JpaRepository<User, Long> { User findByUsername(String username); }
5. 编写Service层
import org.springframework.beans.factory.annotation.Autowired; import org.springframework.security.crypto.bcrypt.BCryptPasswordEncoder; import org.springframework.stereotype.Service; @Service public class UserService { @Autowired private UserRepository userRepository; @Autowired private BCryptPasswordEncoder passwordEncoder; public User registerUser(String username, String password) { User existingUser = userRepository.findByUsername(username); if (existingUser != null) { throw new RuntimeException("Username already exists"); } User user = new User(); user.setUsername(username); user.setPassword(passwordEncoder.encode(password)); // Encrypt password return userRepository.save(user); } public boolean loginUser(String username, String password) { User user = userRepository.findByUsername(username); if (user == null) { return false; } return passwordEncoder.matches(password, user.getPassword()); } }
6. 创建Controller
import org.springframework.beans.factory.annotation.Autowired; import org.springframework.stereotype.Controller; import org.springframework.web.bind.annotation.PostMapping; import org.springframework.web.bind.annotation.RequestParam; import org.springframework.web.bind.annotation.ResponseBody; @Controller public class UserController { @Autowired private UserService userService; @PostMapping("/register") @ResponseBody public String register(@RequestParam String username, @RequestParam String password) { try { userService.registerUser(username, password); return "Registration Successful"; } catch (Exception e) { return "Registration Failed: " + e.getMessage(); } } @PostMapping("/login") @ResponseBody public String login(@RequestParam String username, @RequestParam String password) { if (userService.loginUser(username, password)) { return "Login Successful"; } else { return "Login Failed"; } } }
7. 编写前端页面
Register.html:
<!DOCTYPE html> <html lang="en"> <head> <meta charset="UTF-8"> <meta name="viewport" content="width=device-width, initial-scale=1.0"> <title>Register</title> </head> <body> <h2>Register</h2> <form action="/register" method="post"> <label for="username">Username:</label><br> <input type="text" id="username" name="username"><br> <label for="password">Password:</label><br> <input type="password" id="password" name="password"><br><br> <input type="submit" value="Register"> </form> </body> </html>
login.html:
<!DOCTYPE html> <html lang="en"> <head> <meta charset="UTF-8"> <meta name="viewport" content="width=device-width, initial-scale=1.0"> <title>Login</title> </head> <body> <h2>Login</h2> <form action="/login" method="post"> <label for="username">Username:</label><br> <input type="text" id="username" name="username"><br> <label for="password">Password:</label><br> <input type="password" id="password" name="password"><br><br> <input type="submit" value="Login"> </form> </body> </html>
8.进行测试登陆注册模块
-
手动测试:
- 启动你的Spring Boot应用程序。
- 打开浏览器,并访问注册页面和登录页面(例如,http://localhost:8080/register 和 http://localhost:8080/login)。
- 在注册页面输入用户名和密码,提交注册表单,确保用户信息正确保存到数据库。
- 在登录页面输入注册时使用的用户名和密码,提交登录表单,验证登录功能是否正常。
-
使用自动化测试:
- 使用Spring Boot提供的测试框架,比如JUnit和SpringBootTest,编写单元测试来测试Service层和Repository层的方法。
- 编写集成测试来测试Controller层的方法,可以使用MockMvc来模拟HTTP请求和验证返回结果。
- 可以使用Selenium等工具来进行端到端的UI测试,模拟用户在浏览器中的操作,验证整个系统的功能。
集成测试示例:
import org.junit.jupiter.api.Test; import org.springframework.beans.factory.annotation.Autowired; import org.springframework.boot.test.autoconfigure.web.servlet.AutoConfigureMockMvc; import org.springframework.boot.test.context.SpringBootTest; import org.springframework.http.MediaType; import org.springframework.test.web.servlet.MockMvc; import org.springframework.test.web.servlet.request.MockMvcRequestBuilders; import static org.springframework.test.web.servlet.result.MockMvcResultMatchers.status; @SpringBootTest @AutoConfigureMockMvc public class UserControllerIntegrationTest { @Autowired private MockMvc mockMvc; @Test public void testRegister() throws Exception { String username = "testUser"; String password = "testPassword"; mockMvc.perform(MockMvcRequestBuilders.post("/register") .contentType(MediaType.APPLICATION_FORM_URLENCODED) .param("username", username) .param("password", password)) .andExpect(status().isOk()); } @Test public void testLogin() throws Exception { String username = "testUser"; String password = "testPassword"; mockMvc.perform(MockMvcRequestBuilders.post("/login") .contentType(MediaType.APPLICATION_FORM_URLENCODED) .param("username", username) .param("password", password)) .andExpect(status().isOk()); } }
三、总结
登陆注册功能是Web应用程序中常见的基础功能,其主要作用包括:
1. 用户身份验证:通过登录功能,验证用户输入的用户名和密码是否与系统中存储的信息匹配,从而确认用户的身份。
2. 访问控制:通过用户的身份信息,可以对不同用户提供不同的访问权限,限制用户可以访问的资源或功能。
3. 个性化服务:登录功能可以帮助系统记录用户的偏好和历史行为,从而提供个性化的服务和推荐。
4. 数据安全性:注册功能可以确保用户信息的安全存储,密码通常会进行加密处理,从而提高数据安全性。
进一步实现更复杂的操作可以通过以下方式:
1. 添加验证码功能:为了增强安全性,可以在注册和登录页面添加验证码功能,防止恶意程序进行暴力破解密码。
2. 实现密码找回功能:提供通过邮箱或手机短信等方式找回密码的功能,以应对用户忘记密码的情况。
3. 引入OAuth认证:支持第三方登录,比如使用Google、Facebook等账号登录,提高用户体验。
4. 加入多因素认证:在登录过程中,除了用户名和密码外,还可以要求用户输入其他因素,比如手机验证码或指纹识别,提高安全性。
5. 实现记住我功能:允许用户在下次访问时保持登录状态,避免频繁登录,提高用户体验。
6. 用户信息完善功能:在注册后,引导用户完善个人信息,比如头像、个人简介等,以提供更加个性化的服务。
7. 用户管理功能:提供管理员界面,实现对用户信息的管理,包括禁用账号、修改密码等操作。
8. 安全日志和监控:记录登录日志、异常登录行为等信息,并设置报警机制,及时发现异常情况并采取相应措施。
以上这些扩展和功能可以根据具体的业务需求和安全要求来决定是否实现。
最后谢谢大家

