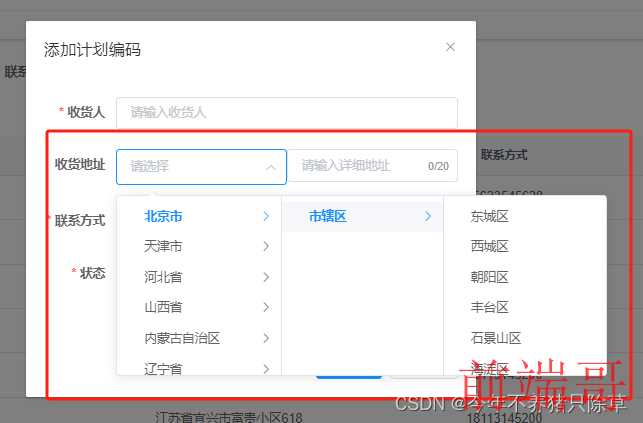
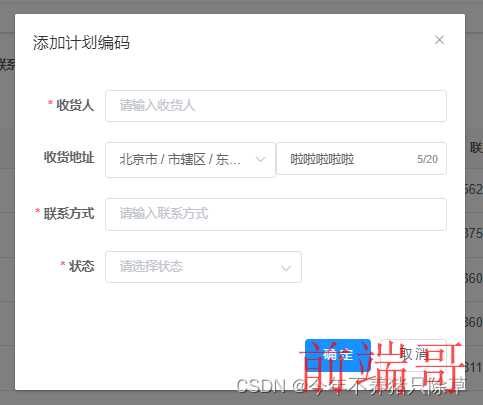
在页面的显示情况


前端拼接实现存储


具体实现步骤
1.安装中国全省市区的数据
在命令提示符窗口使用管理员身份进入对应vue项目的文件夹,在窗口安装
| npm install element-china-area-data -S |
2.在script内引入安装的数据
| import { |
| regionData, |
| codeToText |
| } from "element-china-area-data"; |
3.data内的数据
| data() { |
| return { |
| |
| codeList: [], |
| |
| title: "", |
| |
| open: false, |
| |
| queryParams: { |
| pageNum: 1, |
| pageSize: 10, |
| code: null, |
| custom: null, |
| address: null, |
| phone: null, |
| status: null, |
| }, |
| |
| form: {}, |
| addtions: [], |
| tableData: [], |
| regionDatas: regionData, |
| cateProps: { |
| value: "value", |
| label: "label", |
| children: "children", |
| }, |
| formLabelWidth: "80px", |
| }; |
| }, |
4.点击新增的时候弹出对话框
| <!-- 添加或修改计划编码对话框 --> |
| <el-dialog :title="title" :visible.sync="open" width="500px" append-to-body> |
| <el-form ref="form" :model="form" :rules="rules" label-width="80px"> |
| <el-form-item label="收货地址" prop="address" :label-width="formLabelWidth" v-model="form.address"> |
| <el-col :span="12"> |
| <el-cascader |
| style="width: 100%" |
| clearable |
| size="large" |
| :options="regionDatas" |
| ref="cascaderAddr" |
| :props="cateProps" |
| v-model="form.address1" |
| @change="handleChange" |
| ></el-cascader> |
| </el-col> |
| <el-col :span="12"> |
| <el-input |
| v-model="form.address2" |
| placeholder="请输入详细地址" |
| clearable |
| maxlength="20" |
| show-word-limit |
| ></el-input> |
| </el-col> |
| </el-form-item> |
| </el-form> |
| <div slot="footer" class="dialog-footer"> |
| <el-button type="primary" @click="submitForm">确 定</el-button> |
| <el-button @click="cancel">取 消</el-button> |
| </div> |
| </el-dialog> |
表格绑定address
| <el-table-column label="收货地址" align="center" prop="address" /> |
methods方法
| methods: { |
| |
| handleChange(value) { |
| console.log(value); |
| this.form.address1 = value; |
| var name = ""; |
| this.form.address1.map((item) => (name += codeToText[item] + "")); |
| this.addtions.names = name; |
| }, |
| |
| reset() { |
| this.form = { |
| codeId: null, |
| code: null, |
| custom: null, |
| address: null, |
| address1: [], |
| address2: "", |
| phone: null, |
| status: null, |
| createTime: null, |
| updateTime: null, |
| createBy: null, |
| updateBy: null, |
| del: null, |
| }; |
| this.resetForm("form"); |
| }, |
| |
| submitForm() { |
| this.$refs["form"].validate((valid) => { |
| if (valid) { |
| if (this.form.codeId != null) { |
| this.codeList.push(this.form); |
| this.codeList.forEach((element) => { |
| element.address = this.addtions.names + this.form.address2; |
| }); |
| updateCode(this.form).then((response) => { |
| this.$modal.msgSuccess("修改成功"); |
| this.open = false; |
| this.getList(); |
| }); |
| } else { |
| this.codeList.push(this.form); |
| this.codeList.forEach((element) => { |
| element.address = this.addtions.names + this.form.address2; |
| }); |
| addCode(this.form).then((response) => { |
| this.$modal.msgSuccess("新增成功"); |
| this.open = false; |
| this.getList(); |
| }); |
| } |
| } |
| }); |
| }, |
| |
| cancel() { |
| this.open = false; |
| this.reset(); |
| }, |
| } |
提交方法里主要是
| this.codeList.push(this.form); |
| this.codeList.forEach((element) => { |
| element.address = this.addtions.names + this.form.address2; |
| }); |
这一块的拼接比较重要,其余可自行根据自己的提交方法来


