一、nuxt3项目创建
node版本最好使用18+
| npx nuxi@latest init nuxt3-app |
1.1命令运行后会出现几个选项
选择你的包管理器,我喜欢用yarn,根据你的喜好来

是否初始化git仓库

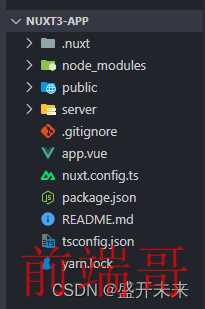
1.2 项目目录结构
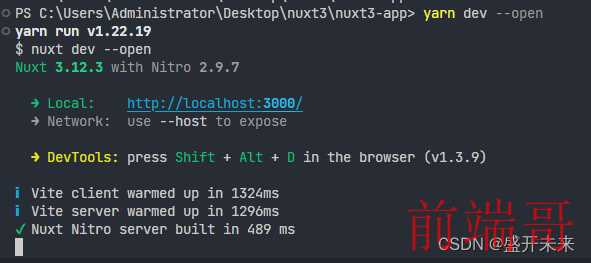
1.3 运行项目
出现以下界面,项目运行成功

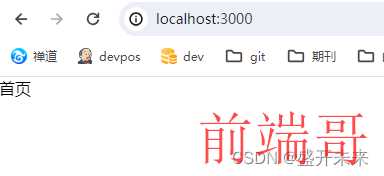
1.4 新增pages/index.vue
| <template> |
| <div>首页</div> |
| </template> |
| <script lang="ts" setup> |
| </script> |
app.vue
| <template> |
| <NuxtPage /> |
| </template> |
| |
| <script lang="ts" setup> |
| </script> |
二、添加依赖
2.1. 添加sass预处理器
2.1.1在项目根目录添加assets/css/main.scss 并添加样式代码
main.scss
| .container { |
| .text { |
| color: red; |
| font-size: 32px; |
| } |
| } |
app.vue
| <template> |
| <div class="container"> |
| <span class="text">文字</span> |
| </div> |
| </template> |
2.1.3 nuxt.config.ts增加配置
| export default defineNuxtConfig({ |
| ... |
| css: ["~/assets/css/main.css"], |
| }) |
效果:

2.2 添加tailwindcss
2.2.1 nuxt.config.ts增加配置
| export default defineNuxtConfig({ |
| ... |
| postcss: { |
| plugins: { |
| tailwindcss: {} |
| } |
| }, |
| }) |
2.2.2 项目根目录下增加tailwind.config.js文件
| |
| module.exports = { |
| content: ['./components/**/*.{js,vue,ts}', './layouts/**/*.vue', './pages/**/*.vue', './plugins/**/*.{js,ts}', './nuxt.config.{js,ts}', './app.vue'], |
| theme: { |
| extend: { |
| colors: { |
| 'dark': '#000', |
| 'theme': '#D20001' |
| }, |
| screens: {} |
| } |
| }, |
| plugins: [] |
| }; |
2.2.3 main.scss增加以下代码
| @tailwind base; |
| @tailwind components; |
| @tailwind utilities; |
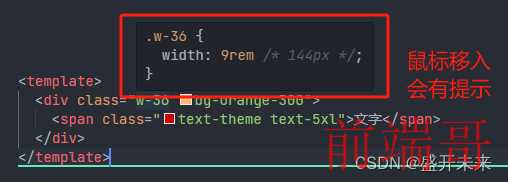
2.2.4 测试效果
| <template> |
| <div class="w-36 bg-orange-300"> |
| <span class="text-theme text-5xl">文字</span> |
| </div> |
| </template> |

2.3 安装 nuxt-icons
2.3.1 nuxt.config.ts 中配置
| export default defineNuxtConfig({ |
| ... |
| modules: [ |
| 'nuxt-icons', |
| ], |
| }) |
2.3.2 新建 assets/icons
放一个svg图标

2.3.3 app.vue添加代码 测试效果
| <template> |
| <NuxtIcon name="wechat" class="text-[80px] text-[#00ff00]"></NuxtIcon> |
| </template> |

2.4 引入element-plus
2.4.1 安装element-plus和@@element-plus/nuxt
| yarn add element-plus -D |
| |
| yarn add @element-plus/nuxt -D |
2.4.2 nuxt.config.ts 配置
| export default defineNuxtConfig({ |
| ... |
| modules: [ |
| 'nuxt-icons', |
| '@pinia/nuxt', |
| '@pinia-plugin-persistedstate/nuxt', |
| '@element-plus/nuxt' |
| ], |
| }) |
2.4.3 测试效果
| <template> |
| <el-button type="primary">login</el-button> |
| </template> |

2.5 添加 pinia 并做持久化
2.5.1 安装 pinia
2.5.2 安装 @pinia-plugin-persistedstate/nuxt
| yarn add @pinia-plugin-persistedstate/nuxt -D |
2.5.3 配置 nuxt.config.ts
| export default defineNuxtConfig({ |
| ... |
| modules: [ |
| 'nuxt-icons', |
| '@pinia/nuxt', |
| '@pinia-plugin-persistedstate/nuxt', |
| ], |
| }) |
2.5.4 新建 store/auth.ts
auth.ts添加代码
| import { acceptHMRUpdate, defineStore } from 'pinia'; |
| |
| interface AuthStore { |
| token: string |
| } |
| |
| export const useAuthStore = defineStore('auth', { |
| state: (): AuthStore => ({ |
| token: '' |
| }), |
| getters: { |
| isLogin: (state) => state.token !== '' |
| }, |
| persist: true |
| }); |
| |
| if (import.meta.hot) {import.meta.hot.accept(acceptHMRUpdate(useAuthStore, import.meta.hot));} |
app.vue添加代码
| <template> |
| <div>token: {{ token }}</div> |
| <div>是否登录:{{ isLogin ? "已登录" : "未登录" }}</div> |
| <el-button type="primary" @click="login">login</el-button> |
| </template> |
| |
| <script lang="ts" setup> |
| const authStore = useAuthStore() |
| const { token, isLogin } = storeToRefs(authStore) |
| |
| |
| const login = () => { |
| setTimeout(() => { |
| authStore.token = "xxxxx" |
| }, 1000) |
| } |
| </script> |
ps:useAuthStore自动导入 需要在nuxt.config.ts 配置imports 选项
| imports: { |
| dirs: ['store/**'] |
| }, |
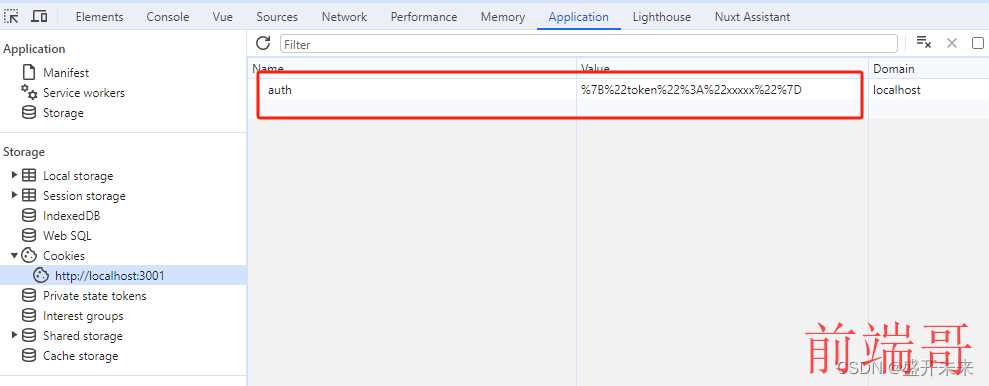
2.5.5 测试效果


持久化成功
2.6 添加Vueuse组合API
| yarn add -D @vueuse/nuxt @vueuse/core |
2.6.1 nuxt.config.ts 增加配置
| export default defineNuxtConfig({ |
| modules: [ |
| '@vueuse/nuxt', |
| ], |
| }) |
2.6.2 app.vue添加代码
| <template> |
| <div class="fixed top-0 left-0">垂直滚动距离:{{ y }}</div> |
| <div class="h-[2000px] bg-[#00ff00]"></div> |
| </template> |
| |
| <script lang="ts" setup> |
| const { y } = useWindowScroll() |
| </script> |
2.6.3 测试效果

vueuse官网还有很多用法,可以参考Vueuse中文文档
三、接口封装(不建议使用axios,nuxt3官方推荐使用useFetch和$fetch)
3.1 新建plugins/my-fetch.ts
| import type { FetchResponse } from 'ofetch'; |
| import Message from '@/components/Message'; |
| |
| export interface ResOptions<T> { |
| code: number |
| data: T |
| msg: string |
| } |
| |
| |
| |
| |
| export enum ResponseStatusCodes { |
| SUCCESS = 200, |
| TOKEN_EXPIRATION = 401, |
| CUSTOM = 4096, |
| ERROR = 500, |
| } |
| |
| |
| |
| |
| |
| const err = (text: string) => { |
| Message.error({ |
| text: text, |
| duration: 1500 |
| }); |
| }; |
| |
| |
| |
| |
| const clearLoginInfo = () => { |
| |
| }; |
| |
| |
| |
| |
| |
| const handleFail = <T>( |
| response: FetchResponse<ResOptions<T>> & FetchResponse<ResponseType> |
| ) => { |
| err('网络服务异常,请重新加载或联系客服'); |
| return Promise.reject(new Error('网络服务异常,请重新加载或联系客服')); |
| }; |
| |
| |
| |
| |
| |
| const handleResponse = <T>( |
| response: FetchResponse<ResOptions<T>> & FetchResponse<ResponseType> |
| ): any => { |
| |
| if (response._data?.code === ResponseStatusCodes.ERROR) { |
| err('网络服务异常,请重新加载或联系客服'); |
| return Promise.reject(new Error('网络服务异常,请重新加载或联系客服')); |
| } |
| |
| if (response._data?.code === ResponseStatusCodes.TOKEN_EXPIRATION) { |
| clearLoginInfo(); |
| return Promise.reject(new Error('登录失效,请重新登录')); |
| } |
| |
| if (response._data?.code === ResponseStatusCodes.CUSTOM) { |
| err(response._data.msg); |
| return Promise.reject(new Error(response._data.msg)); |
| } |
| }; |
| |
| export default defineNuxtPlugin(() => { |
| const runtimeConfig = useRuntimeConfig(); |
| const myFetch = $fetch.create({ |
| |
| onRequest({ options }) { |
| options.baseURL = runtimeConfig.public.apiBaseURL; |
| options.headers = new Headers(options.headers); |
| |
| options.headers.set('platform', '11'); |
| options.headers.set('c-fronted', 'c-fronted-identify'); |
| options.headers.set('X-Requested-With', 'XMLHttpRequest'); |
| options.headers.set('Content-type', 'application/json'); |
| }, |
| |
| onResponse({ response }): any { |
| |
| if (response.status !== ResponseStatusCodes.SUCCESS) { |
| return handleFail(response); |
| } |
| |
| |
| if (response._data?.code === ResponseStatusCodes.SUCCESS) { |
| response._data = response._data.data; |
| } else { |
| return handleResponse(response); |
| } |
| }, |
| |
| onResponseError({ response }) { |
| return handleFail(response); |
| } |
| }); |
| return { |
| provide: { myFetch } |
| }; |
| }); |
3.2 新建apis/home.ts
| export type BannerListItem = { |
| bannerUrl?: string; |
| id?: number; |
| link?: string; |
| name?: string; |
| type?: number; |
| } |
| |
| |
| export const getBannerList = (params: { type: number }) => { |
| const { $myFetch } = useNuxtApp(); |
| return $myFetch<BannerListItem[]>('/tsoweb/frontend/banner/list', { |
| method: 'GET', |
| params |
| }); |
| }; |
3.3 组件使用
| <script lang="ts" setup> |
| |
| const bannerList = ref<BannerListItem[]>([]); |
| const { data: bannerData } = await useAsyncData(() => getBannerList({ type: 6 })); |
| bannerList.value = bannerData.value || []; |
| |
| </script> |
getBannerList无需引入,需要在nuxt.config.ts 配置imports选项
| imports: { |
| dirs: ['store/**', 'apis/**'] |
| }, |
更多详细文档请参考nuxt3中文文档


