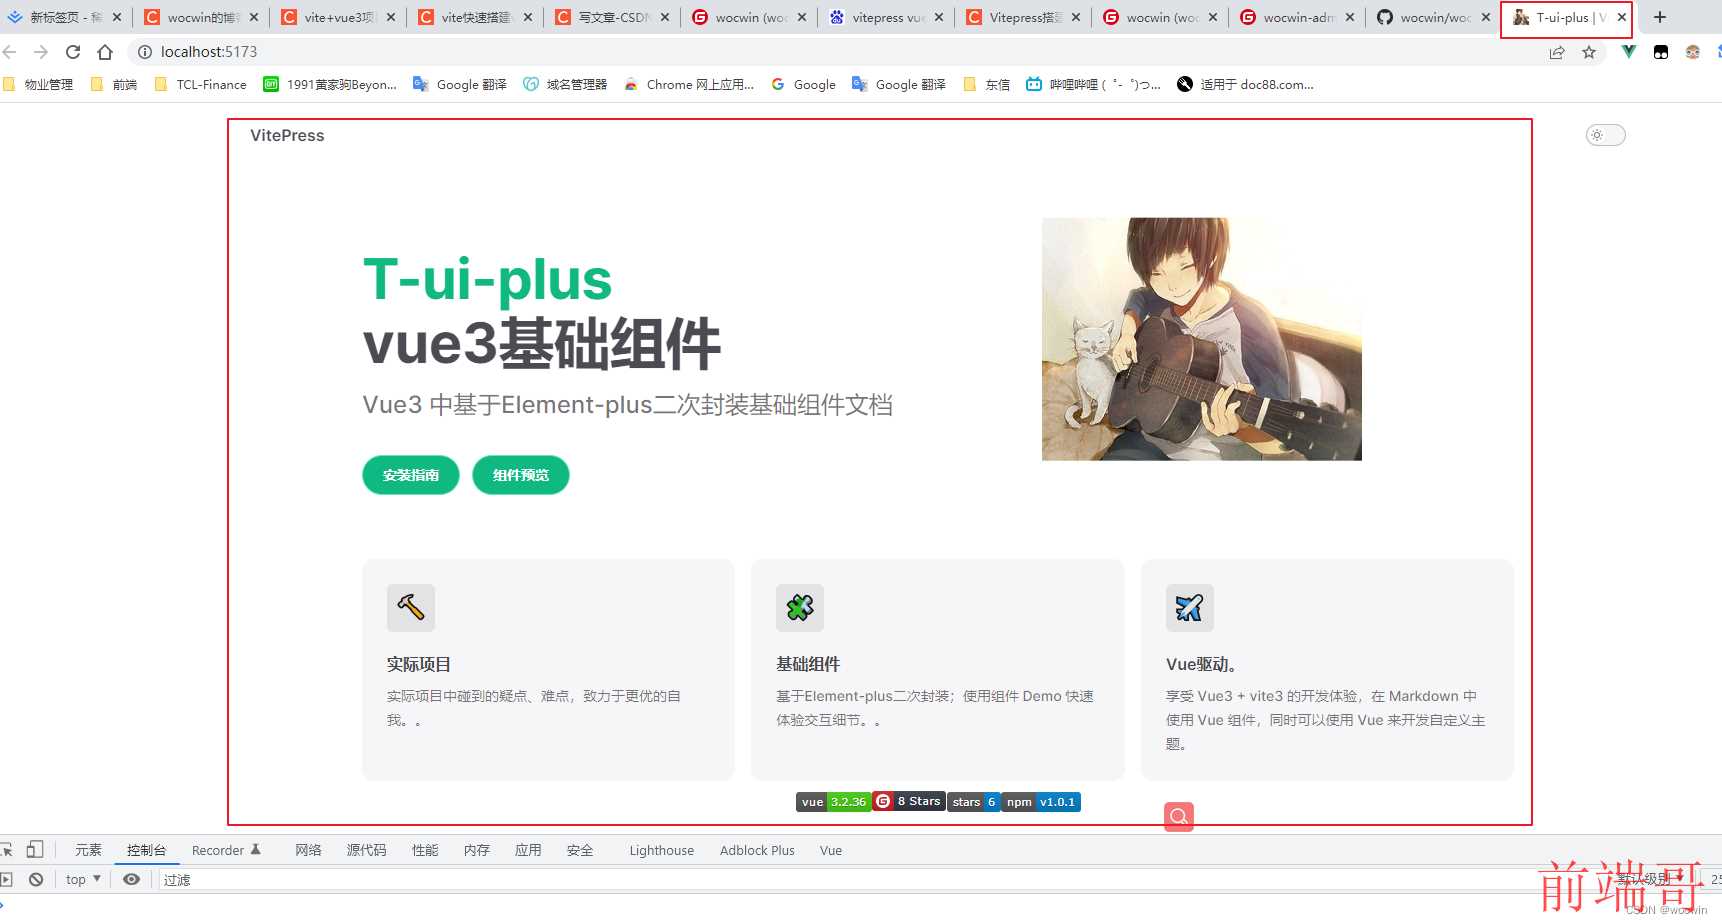
最终效果

一、创建Vue3+Vite项目
可以参考我之前发布的vite快速搭建vue3项目文章来创建;也可以直接使用我开源Vue3.2+Ts+Vite3+Pinia+Element-Plus模板wocwin-admin
以下我以 wocwin-admin 项目为例
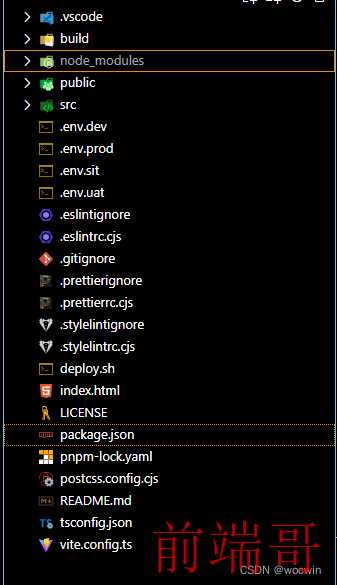
当前目录结构如下
二、组件开发
1、首先需要创建一个 packages 目录,用来存放组件
2、该目录下存放每个组件单独的开发目录,和一个 index.ts 整合所有组件,并对外导出
3、每个组件都应该归类于单独的目录下,包含其组件源码目录 src,和 index.ts 便于外部引用
4、这里以组件 TTable 为例,完整的 packages 目录结构如下:
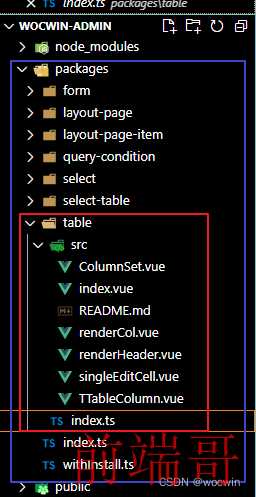
5、需要注意的是,组件必须声明 name,这个 name 就是组件的标签
6、整合并导出组件
1、编辑 packages/table/index.ts,实现组件的导出
import Table from './src/index.vue' import { withInstall } from '../withInstall' const TTable = withInstall(Table) export default TTable
2、编辑 packages/index.ts 文件,实现组件的全局注册
... import TTable from './table' // 存储组件列表 const components = [ TTable, .... ] // 插件注册:在 Vue 项目的入口文件中,通过 ( app.use(插件) ) 进行注册 const installComponents = (app: any) => { components.forEach((comp: any) => { app.component(comp.name as string, comp) }) } const install = (app: any, router?: any) => { installComponents(app) } export default { ...components, // 按需引入 // 导出的对象必须具有 install,才能被 Vue.use() 方法安装 install }
三、集成vitepress及完善其配置
一、集成viitepress
1、安装vitepress(也看用yarn、npm)
pnpm add vitepress -D
2、根目录下创建目录 docs并在 其目录中创建 index.md 文件其内容如下:
# Hello Vitepress
3、在docs下新建public文件夹,并追加图片及.ico和静态资源文件(css)
4、添加 scripts
"scripts": { "docs:dev": "vitepress dev docs", "docs:build": "vitepress build docs" },
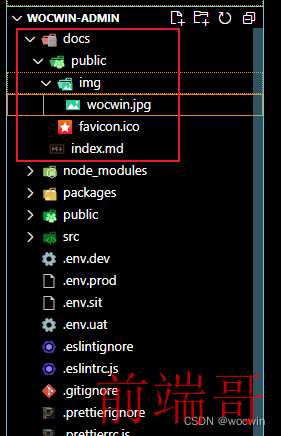
5、至此文档目录结构如下
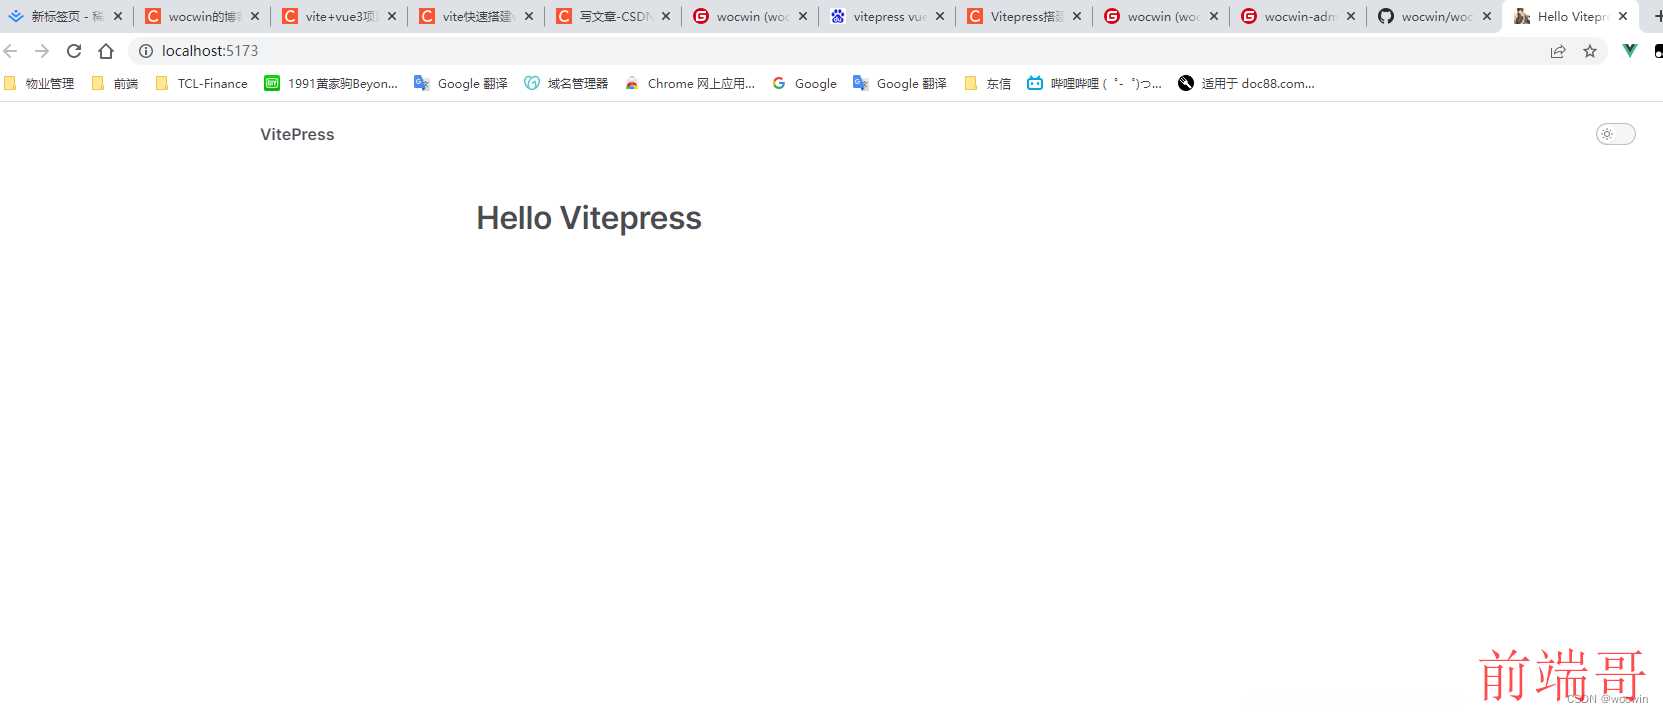
6、启动vitepress文档,页面如下
二、配置 vitepress
1、首页配置(即:docs/index.md文件)如下修改:
--- layout: home title: T-ui-plus # titleTemplate: 选项卡描述 editLink: true lastUpdated: true hero: name: T-ui-plus text: vue3基础组件 tagline: Vue3 中基于Element-plus二次封装基础组件文档 image: src: /img/wocwin.jpg alt: t-ui-plus actions: - theme: brand text: 安装指南 link: /components/ - theme: brand text: 组件预览 link: /components/TSelect/base.md features: - icon: 🔨 title: 实际项目 details: 实际项目中碰到的疑点、难点,致力于更优的自我。。 - icon: 🧩 title: 基础组件 details: 基于Element-plus二次封装;使用组件 Demo 快速体验交互细节。。 - icon: ✈️ title: Vue驱动。 details: 享受 Vue3 + vite3 的开发体验,在 Markdown 中使用 Vue 组件,同时可以使用 Vue 来开发自定义主题。 --- <p style="display: flex; justify-content: center; align-items: center; margin-top: 10px;"> <a href="https://github.com/vuejs/vue" target="_blank"> <img src="https://img.shields.io/badge/vue-3.2.36-brightgreen.svg" alt="vue3"> </a> <a href="https://gitee.com/wocwin/t-ui-plus/stargazers" target="_blank"> <img src="https://gitee.com/wocwin/t-ui-plus/badge/star.svg?theme=dark" alt="t-ui-plus"> </a> <a href="https://github.com/wocwin/t-ui-plus/stargazers" target="_blank"> <img src="https://img.shields.io/github/stars/wocwin/t-ui-plus.svg" alt="t-ui-plus"> </a> <a href="https://www.npmjs.com/package/@wocwin/t-ui-plus" target="_blank"> <img alt="npm" src="https://img.shields.io/npm/v/@wocwin/t-ui-plus.svg" /> </a> </p>
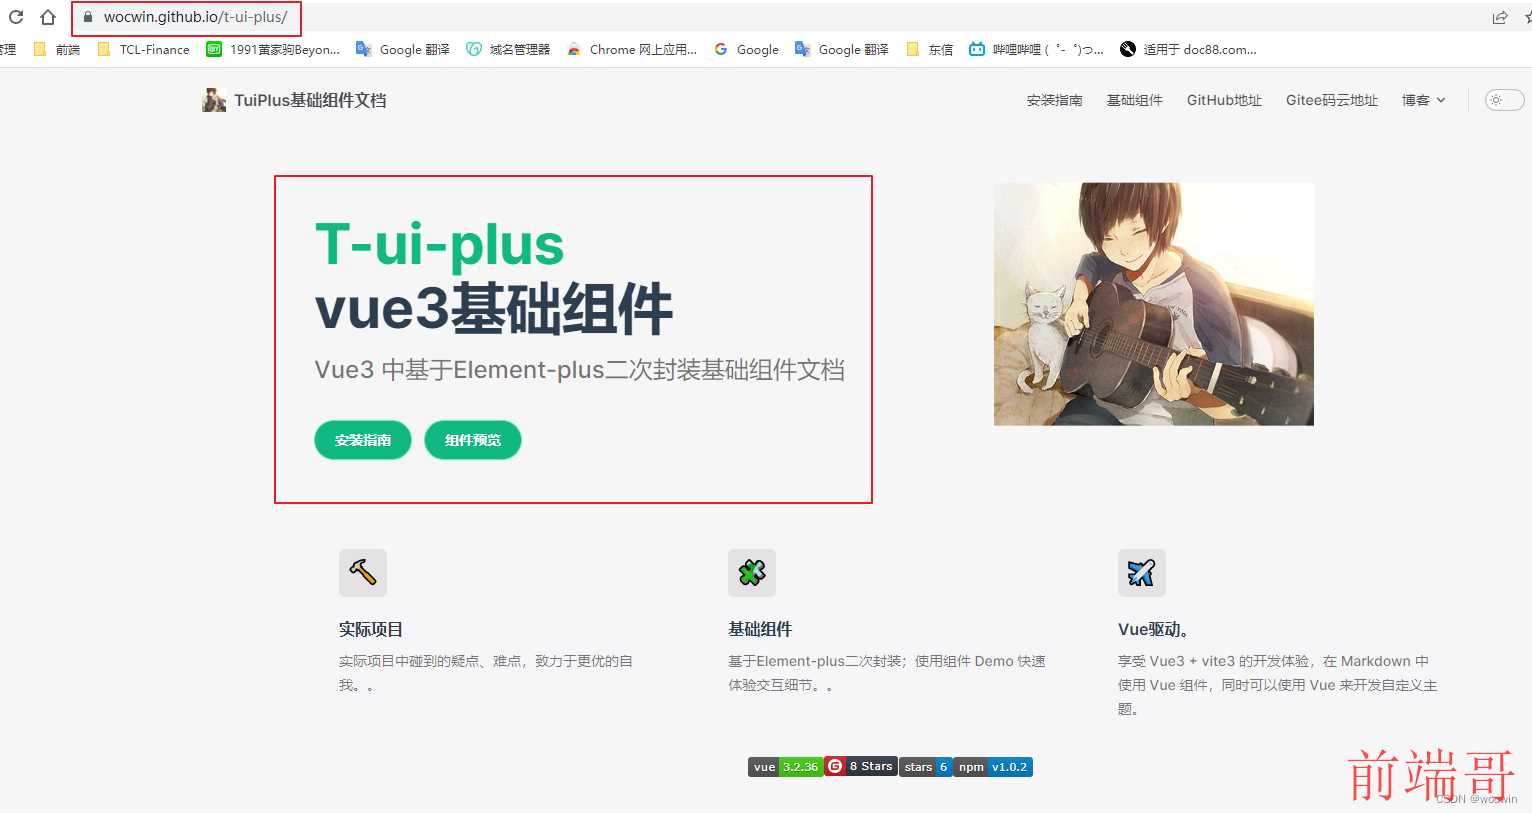
修改后 页面如下:
2、在 docs 目录下新建目录components,在该目录中创建 对应组件渲染.md文件:
3、在 docs 目录下新建目录demos,在该目录中创建 对应组件渲染.vue 文件:
4、在 docs 目录下新建目录 .vitepress,在该目录中创建 config.ts 文件:
1、配置nav(定义顶部导航)
2、配置侧边栏
3、配置主题
4、最终config.ts 文件如下
页面效果如下
import { defineConfig } from 'vitepress' export default defineConfig({ title: 'TuiPlus基础组件文档', description: '基于Element-plus基础组件封装使用', lang: 'cn-ZH', base: '/t-ui-plus/', lastUpdated: true, themeConfig: { logo: '/favicon.ico', siteTitle: 'TuiPlus基础组件文档', outline: 3, socialLinks: [ { icon: 'github', link: 'https://github.com/wocwin/t-ui-plus' } ], nav:[ { text: '安装指南', link: '/components/' }, { text: '基础组件', link: '/components/TSelect/base.md' }, { text: 'GitHub地址', link: 'https://github.com/wocwin/t-ui-plus' }, { text: 'Gitee码云地址', link: 'https://gitee.com/wocwin/t-ui-plus' }, { text: '博客', items: [ { text: 'CSDN', link: 'https://blog.csdn.net/cwin8951' }, { text: '掘金', link: 'https://juejin.cn/user/888061128344087/posts' } ] } ], sidebar:{ '/components': [ { text: '常用组件', items: [ { text: '下拉选择组件', link: '/components/TSelect/base.md' }, { text: '下拉选择表格组件', link: '/components/TSelectTable/base.md' }, ] }, { text: '复杂组件', items: [ { text: '条件查询组件', link: '/components/TQueryCondition/base.md' }, { text: '表单组件', link: '/components/TForm/base.md' }, { text: 'table组件', link: '/components/TTable/base.md' }, ] } ] } }, markdown: { config(md) { md.use(demoblock) } } })
三、vitepress文档渲染.vue组件(推荐使用第二种方式)
第一种方式:使用vitepress-theme-demoblock插件
1、安装vitepress-theme-demoblock插件
pnpm add vitepress-theme-demoblock -D
2、先注册vitepress-theme-demoblock 提供的markdown解析插件(修改config.ts)
import { demoBlockPlugin } from 'vitepress-theme-demoblock' export default defineConfig({ markdown: { ... config(md) { md.use(demoBlockPlugin, { customClass: 'demoblock-custom' }) } } })
3、再引入 vitepress-theme-demoblock 提供的demo组件
1、在.vitepress下新建theme文件夹,并新建index.ts文件
2、引入element-plus、@wocwin/t-ui-plus(自己封装的组件)、及静态css资源
/*docs\public\css\index.css*/ :root { --vp-c-brand: #646cff; --vp-c-brand-light: #747bff; --vp-c-brand-lighter: #9499ff; --vp-c-brand-lightest: #bcc0ff; --vp-c-brand-dark: #535bf2; --vp-c-brand-darker: #454ce1; --demoblock-border:#e7e7e7; --vp-code-block-bg: #f9fafb; } .demo-block .meta { background-color: var(--vp-code-block-bg); } .demo-block .t_layout_page{ overflow: visible; padding: 0; } .demo-block .t_layout_page .t_layout_page_item{ padding: 0; margin: 0; } html.dark { --vp-code-block-bg: var(--vp-c-bg-alt); }
3、useComponents.js怎么生成(package.json配置命令scripts,vitepress-rc用来注册组件(–docsDir 指定docs目录,–componentsDir 指定组件注册目录))
"scripts": { "docs:dev": "pnpm run register:components && vitepress dev docs", "docs:build": "pnpm run register:components && vitepress build docs", "register:components": "vitepress-rc" },
4、theme/index.ts完整代码如下
import DefaultTheme from 'vitepress/theme' // 演示组件 import 'vitepress-theme-demoblock/dist/theme/styles/index.css' import { useComponents } from './useComponents' import ElementPlus from 'element-plus' import 'element-plus/dist/index.css' import locale from 'element-plus/lib/locale/lang/zh-cn' // 图标并进行全局注册 import * as ElementPlusIconsVue from '@element-plus/icons-vue' // 基于element-plus二次封装基础组件 import TuiPlus from '../../../packages' import '../../public/css/index.css' // 静态css资源 export default { ...DefaultTheme, enhanceApp({app}) { // 注册ElementPlus app.use(ElementPlus, { locale // 语言设置 }) // 注册所有图标 for (const [key, component] of Object.entries(ElementPlusIconsVue)) { app.component(key, component) } // 全局注册基础组件 app.use(TuiPlus) app.component('Demo', Demo) app.component('DemoBlock', DemoBlock) } }
5、使用demo组件

第二种方式:自己封装Demo组件地址
三、编写 package.json 文件
1、package.json 文件里面有很多字段要填写,否则不能正确发布。最重要的是以下几个:
- name: 包名,该名字是唯一的。可在 npm 官网搜索名字,如果存在则需换个名字。
- version: 版本号,不能和历史版本号相同。
- main: 入口文件,默认为 index.js,这里改为 lib/t-ui-plus.umd.cjs。
- module: 模块入口,这里改为 lib/t-ui-plus.umd.cjs。
- private:false
四、vite 打包配置(修改vite.config.ts文件)新增如下代码:
build: { outDir: 'lib', rollupOptions: { // 请确保外部化那些你的库中不需要的依赖 external: ['vue'], output: { // 在 UMD 构建模式下为这些外部化的依赖提供一个全局变量 globals: { vue: 'Vue', }, }, }, lib: { entry: './packages/index.ts', name: 't-ui-plus', } },
五、发布到npm
1、先查看 npm 的 registry
npm config get registry
2、设置 npm 的 registry 为官方源
npm config set registry https://registry.npmjs.org
3、执行命令 npm login 登录到 npm
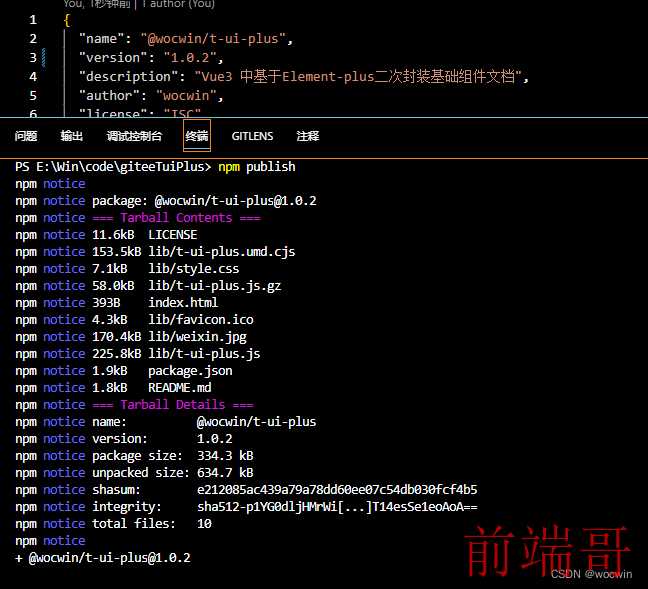
4、执行命令 npm publish 发布到 npm
如出现以下信息,则证明包发布成功:
5、注:上传的 npm 包,在 72小时 后不可删除,如果是测试用的包,记得 72小时 内删除。
六、安装验证
1、执行 npm i @wocwin/t-ui-plus 命令
npm i @wocwin/t-ui-plus
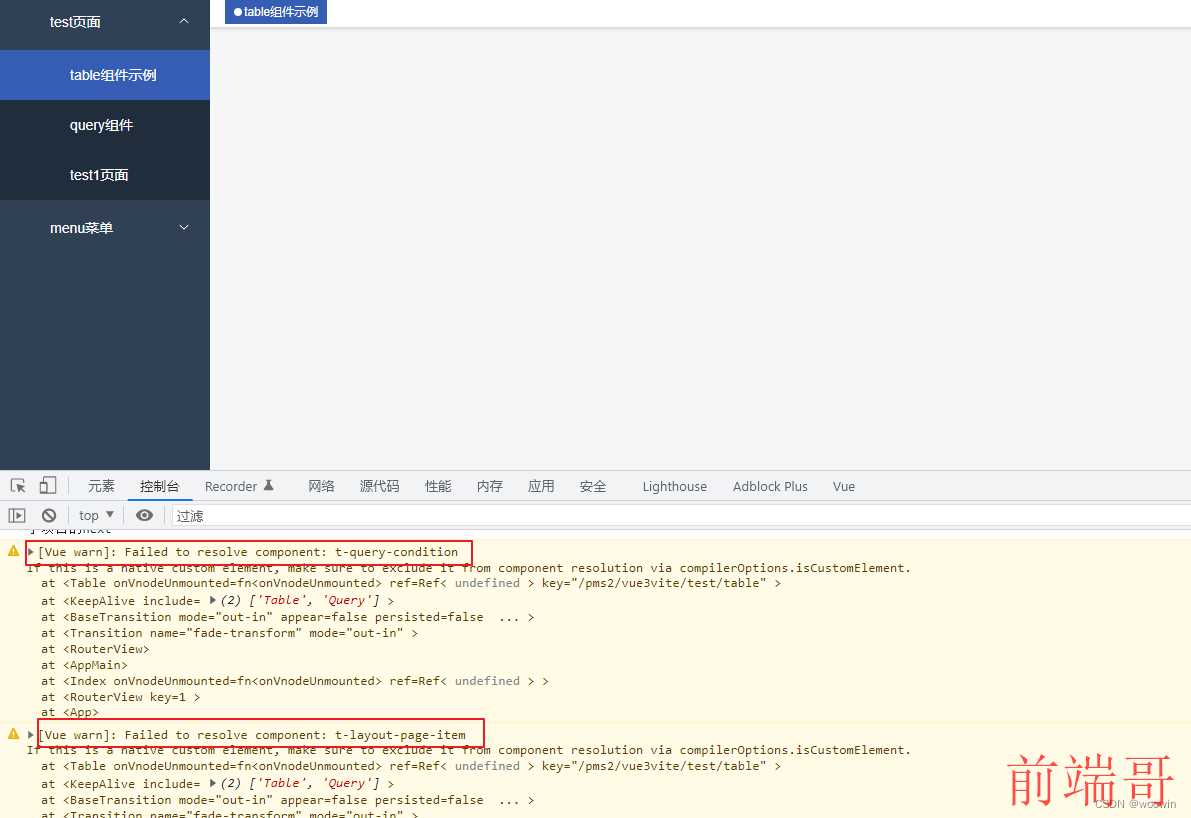
2、页面使用报如下错误,表示没有注册
3、在 main.ts 引入并注册(还需要引入样式)
import TuiPlus from '@wocwin/t-ui-plus' import '@wocwin/t-ui-plus/lib/style.css' instance.use(TuiPlus)
4、页面效果

七、部署 github pages
1、在 docs/.vitepress/config.ts 中设置正确的base。
2、如果要部署到 https://.github.io/,则可以省略 base,因为它默认为 “/”。
3、如果您要部署到 https://.github.io/<REPO>/,例如,您的存储库位于 github.com/<REPO>/,然后将 base 设置为 /<REPO>/
例如我的要部署到https://wocwin.github.io/t-ui-plus;那需要定义base是:/t-ui-plus/
4、在根目录新增deploy.sh文件(把项目推送到github并新增一个gh-pages分支)
# 确保脚本抛出遇到的错误 set -e # 生成静态文件 yarn run docs:build # 进入生成的文件夹 cd docs/.vitepress/dist git init git add -A git commit -m 'deploy' # 如果发布到 https://<USERNAME>.github.io/<REPO> git push -f https://github.com/wocwin/t-ui-plus.git master:gh-pages cd -
5、package.json scripts新增deploy命令
"scripts": { "deploy": "deploy.sh", }
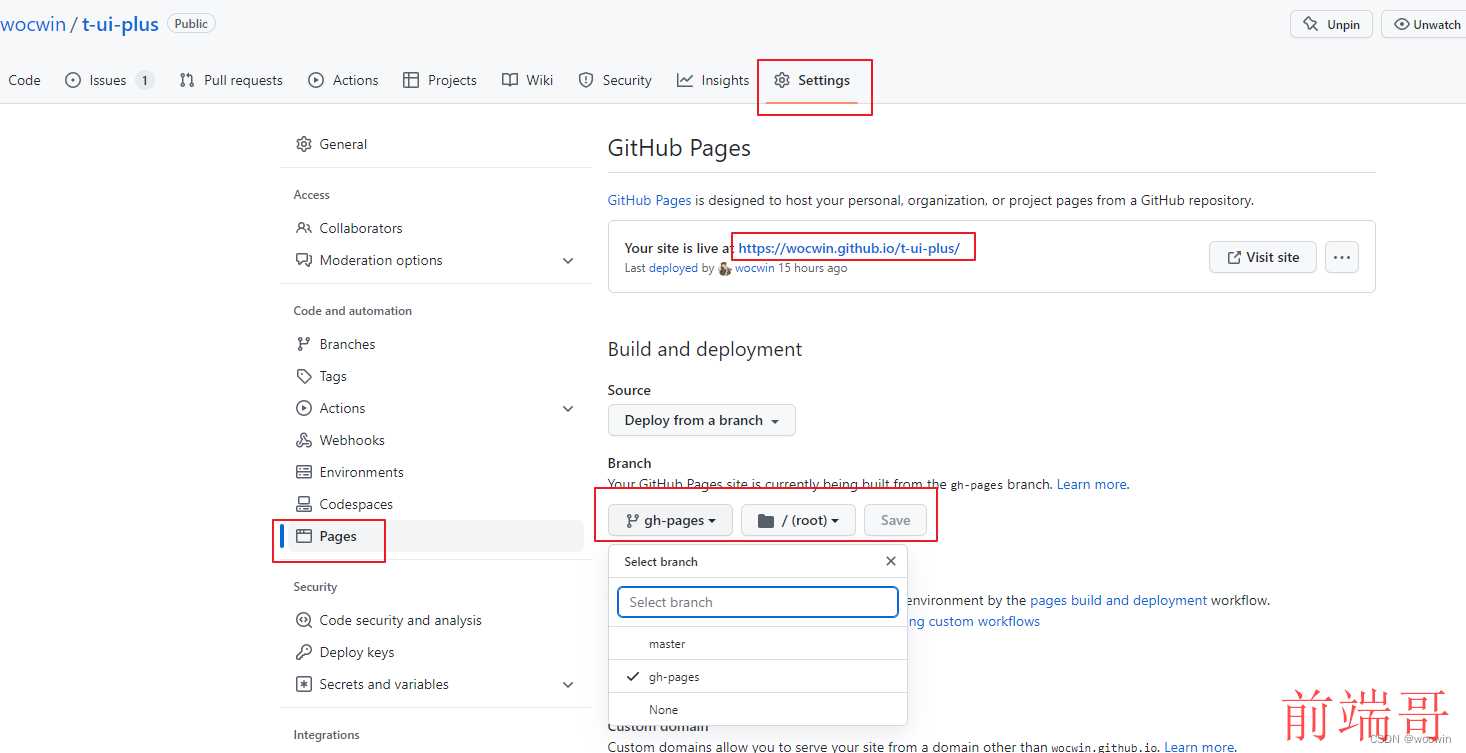
6、执行命令成功后,在github中如下配置
7、页面效果
最终目录结构
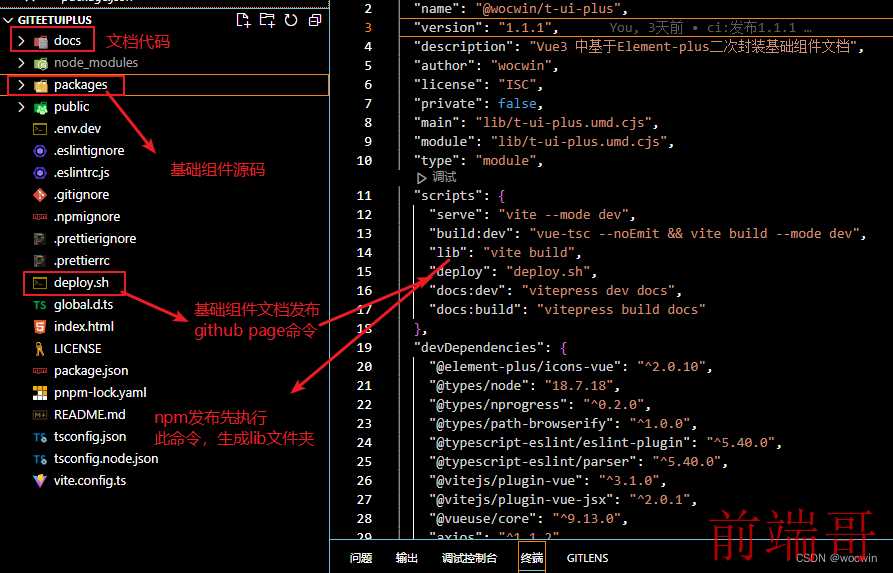
文档目录
├─ examples # VPDemo组件自动解析此文件夹下的所有.vue文件 ├─ components # 基础组件demo示例.md文件 ├─ public # 静态资源文件 ├─ .vitepress │ ├─ config # 插件配置 | │ ├─ global.ts # 全局变量定义 | │ └─ plugins.ts # 自定义.md文件渲染 │ ├─ theme # 主题配置 │ ├─ utils # 文档展开隐藏代码高亮 │ ├─ vitepress | │ ├─ vp-demo # VPDemo组件源码 | │ ├─ style # VPDemo组件样式 | │ └─ index.ts # 暴露VPDemo组件 │ └─ config.ts # vitepress配置文件 ├─ index.md # 文档home页面 ├─ tsconfig.json # typescript 全局配置 └─ vite.config.ts # vite 全局配置文件(支持tsx)
源码地址
gitHub组件地址
gitee码云组件地址
相关文章
基于ElementUi&Antd再次封装基础组件文档
vue3+ts基于Element-plus再次封装基础组件文档
vite+vue3+ts项目搭建之集成qiankun

