这里写目录标题
- vue2 + quill + elementui 实现富文本的保姆教程
- 基本使用
- 1、下载vue-quill-editor组件
- 2、引入· 富文本组件
- 3、设置工具栏
- 4、修改字体大小选项
- 5、设置工具栏中文提示
- 6、在组件页面怎么使用
- 扩展使用
- 1、在组件页面怎么使用
- 2、改造视频 精华啊精华,重点啊重点
- 效果
- 我知道你很急但是你别急的完整代码
- 总结
- 后续补充内容
vue2 + quill + elementui 实现富文本的保姆教程
基本使用
1、下载vue-quill-editor组件
| npm install vue-quill-editor -S |
2、引入· 富文本组件
| import 'quill/dist/quill.core.css' |
| import 'quill/dist/quill.snow.css' |
| import 'quill/dist/quill.bubble.css' |
| import { quillEditor } from 'vue-quill-editor' |
| components: { |
| quillEditor |
| } |
3、设置工具栏
| |
| const toolbarOptions = [ |
| ["bold", "italic", "underline", "strike"], |
| ["blockquote", "code-block"], |
| [{ list: "ordered" }, { list: "bullet" }], |
| [{ indent: "-1" }, { indent: "+1" }], |
| [{ size: []}], |
| [{ header: [1, 2, 3, 4, 5, 6, false] }], |
| [{ color: [] }, { background: [] }], |
| [{ align: [] }], |
| ["clean"], |
| ['image', 'video'] |
| ] |
4、修改字体大小选项
| import { Quill } from 'vue-quill-editor' |
| |
| |
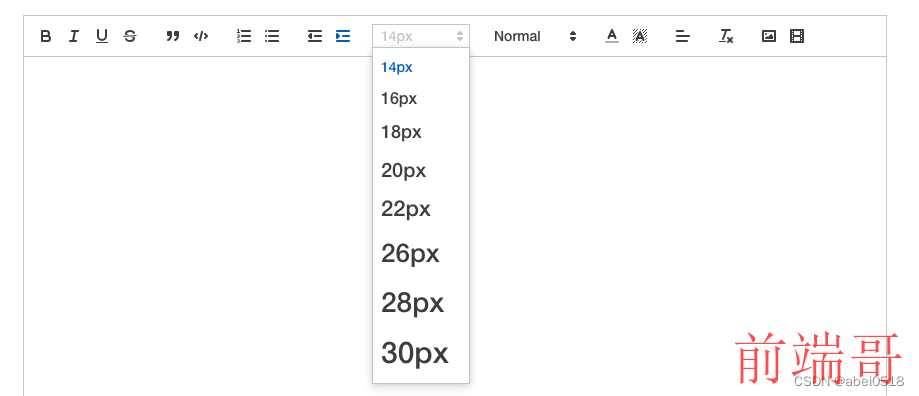
| var sizes = [false, "16px", "18px", "20px", "22px", "26px", "28px", "30px"]; |
| var Size = Quill.import("formats/size"); |
| Size.whitelist = sizes; |
| |
| [{ size: sizes }], |
这还没完,有个啥问题
默认的字体工具栏是这样的
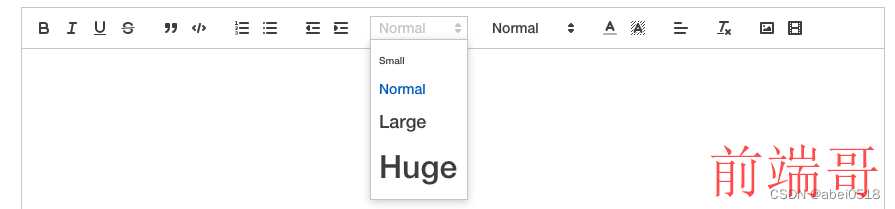
修改后是这样式儿的

所以,还得加个样式
| |
| |
| |
| .ql-snow .ql-picker.ql-size .ql-picker-label::before, |
| .ql-snow .ql-picker.ql-size .ql-picker-item::before { |
| content: "14px"; |
| } |
| .ql-snow .ql-picker.ql-size .ql-picker-label[data-value="14px"]::before, |
| .ql-snow .ql-picker.ql-size .ql-picker-item[data-value="14px"]::before { |
| content: "14px"; |
| font-size: 14px; |
| } |
| |
| .ql-size-14px { |
| font-size: 14px; |
| } |
| |
| .ql-snow .ql-picker.ql-size .ql-picker-label[data-value="16px"]::before, |
| .ql-snow .ql-picker.ql-size .ql-picker-item[data-value="16px"]::before { |
| content: "16px"; |
| font-size: 16px; |
| } |
| |
| .ql-size-16px { |
| font-size: 16px; |
| } |
| |
| .ql-snow .ql-picker.ql-size .ql-picker-label[data-value="18px"]::before, |
| .ql-snow .ql-picker.ql-size .ql-picker-item[data-value="18px"]::before { |
| content: "18px"; |
| font-size: 18px; |
| } |
| |
| .ql-size-18px { |
| font-size: 18px; |
| } |
| |
| .ql-snow .ql-picker.ql-size .ql-picker-label[data-value="20px"]::before, |
| .ql-snow .ql-picker.ql-size .ql-picker-item[data-value="20px"]::before { |
| content: "20px"; |
| font-size: 20px; |
| } |
| |
| .ql-size-20px { |
| font-size: 20px; |
| } |
| |
| .ql-snow .ql-picker.ql-size .ql-picker-label[data-value="22px"]::before, |
| .ql-snow .ql-picker.ql-size .ql-picker-item[data-value="22px"]::before { |
| content: "22px"; |
| font-size: 22px; |
| } |
| |
| .ql-size-22px { |
| font-size: 22px; |
| } |
| |
| .ql-snow .ql-picker.ql-size .ql-picker-label[data-value="26px"]::before, |
| .ql-snow .ql-picker.ql-size .ql-picker-item[data-value="26px"]::before { |
| content: "26px"; |
| font-size: 26px; |
| } |
| |
| .ql-size-26px { |
| font-size: 26px; |
| } |
| |
| .ql-snow .ql-picker.ql-size .ql-picker-label[data-value="28px"]::before, |
| .ql-snow .ql-picker.ql-size .ql-picker-item[data-value="28px"]::before { |
| content: "28px"; |
| font-size: 28px; |
| } |
| |
| .ql-size-28px { |
| font-size: 28px; |
| } |
| |
| .ql-snow .ql-picker.ql-size .ql-picker-label[data-value="30px"]::before, |
| .ql-snow .ql-picker.ql-size .ql-picker-item[data-value="30px"]::before { |
| content: "30px"; |
| font-size: 30px; |
| } |
| |
| .ql-size-30px { |
| font-size: 30px; |
| } |
| |
完美
5、设置工具栏中文提示
| |
| |
| const titleConfig = { |
| 'ql-bold': '加粗', |
| 'ql-font': '字体', |
| 'ql-code': '插入代码', |
| 'ql-italic': '斜体', |
| 'ql-link': '添加链接', |
| 'ql-color': '字体颜色', |
| 'ql-background': '背景颜色', |
| 'ql-size': '字体大小', |
| 'ql-strike': '删除线', |
| 'ql-script': '上标/下标', |
| 'ql-underline': '下划线', |
| 'ql-blockquote': '引用', |
| 'ql-header': '标题', |
| 'ql-indent': '缩进', |
| 'ql-list': '列表', |
| 'ql-align': '文本对齐', |
| 'ql-direction': '文本方向', |
| 'ql-code-block': '代码块', |
| 'ql-formula': '公式', |
| 'ql-image': '图片', |
| 'ql-video': '视频', |
| 'ql-clean': '清除字体样式' |
| } |
| export function setQuillTitle () { |
| const oToolBar = document.querySelector('.ql-toolbar') |
| const aButton = oToolBar.querySelectorAll('button') |
| const aSelect = oToolBar.querySelectorAll('select') |
| aButton.forEach(function (item) { |
| if (item.className === 'ql-script') { |
| item.value === 'sub' ? item.title = '下标' : item.title = '上标' |
| } else if (item.className === 'ql-indent') { |
| item.value === '+1' ? item.title = '向右缩进' : item.title = '向左缩进' |
| } else { |
| item.title = titleConfig[item.className] |
| } |
| }) |
| |
| aSelect.forEach(function (item) { |
| if (item.className.indexOf('ql-background') > -1) { |
| item.previousSibling.title = titleConfig['ql-background'] |
| } else if (item.className.indexOf('ql-color') > -1) { |
| item.previousSibling.title = titleConfig['ql-color'] |
| } else { |
| item.parentNode.title = titleConfig[item.className] |
| } |
| }) |
| } |
6、在组件页面怎么使用
| <quill-editor :content="content" :options="editorOptions" class="ql-snow ql-editor" ref="myQuillEditor" @change="onEditorChange($event)"> |
| </quill-editor> |
| |
| |
| import { setQuillTitle } from './quill-title.js' |
| mounted () { |
| |
| setQuillTitle() |
| }, |
| |
| data () { |
| let _self = this; |
| return { |
| editorOptions: { |
| placeholder: '', |
| theme: 'snow', |
| modules: { |
| toolbar: { |
| container: toolbarOptions, |
| } |
| } |
| } |
| } |
| }, |
| |
| methods: { |
| |
| onEditorChange ({ quill, html, text }) { |
| |
| |
| this.$emit('update:content', html) |
| this.$emit('change', html) |
| } |
| } |
扩展使用
1、在组件页面怎么使用
| npm i quill-image-drop-module -S |
| npm i quill-image-resize-module -S |
| import { Quill } from 'vue-quill-editor' |
| import { ImageDrop } from 'quill-image-drop-module' |
| import ImageResize from 'quill-image-resize-module' |
| |
| Quill.register('modules/imageDrop', ImageDrop); |
| Quill.register('modules/imageResize', ImageResize); |
| editorOptions: { |
| placeholder: '', |
| theme: 'snow', |
| modules: { |
| imageDrop: true, |
| imageResize: { |
| displayStyles: { |
| backgroundColor: "black", |
| border: "none", |
| color: "white" |
| }, |
| modules: ["Resize", "DisplaySize", "Toolbar"] |
| }, |
| toolbar: { |
| container: toolbarOptions, |
| handlers: { |
| 'video': () => { |
| |
| _self.videoForm.show = true |
| this.range = this.$refs.myQuillEditor.quill.selection.savedRange.index |
| }, |
| 'image': (value) => { |
| document.querySelector('.avatar-uploader input').click() |
| this.range = this.$refs.myQuillEditor.quill.selection.savedRange.index |
| } |
| } |
| } |
| } |
| } |
配置完后会报错,需要在webpack里在操作一番
| const { defineConfig } = require("@vue/cli-service"); |
| const webpack = require("webpack"); |
| |
| module.exports = defineConfig({ |
| transpileDependencies: true, |
| configureWebpack: { |
| plugins: [ |
| new webpack.ProvidePlugin({ |
| "window.Quill": "quill/dist/quill.js", |
| Quill: "quill/dist/quill.js", |
| }), |
| ], |
| }, |
| }); |
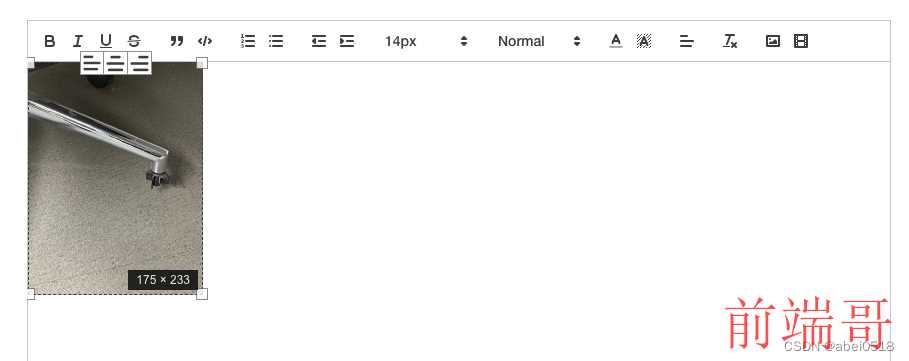
图片上传如果直接用富文本的原本的不修改的话,存储的是base64格式,如果后端存储允许可以忽略handlers里的配置,建议是最好改造一下,之后存储的地址格式就是url也可以对文件大小做限制
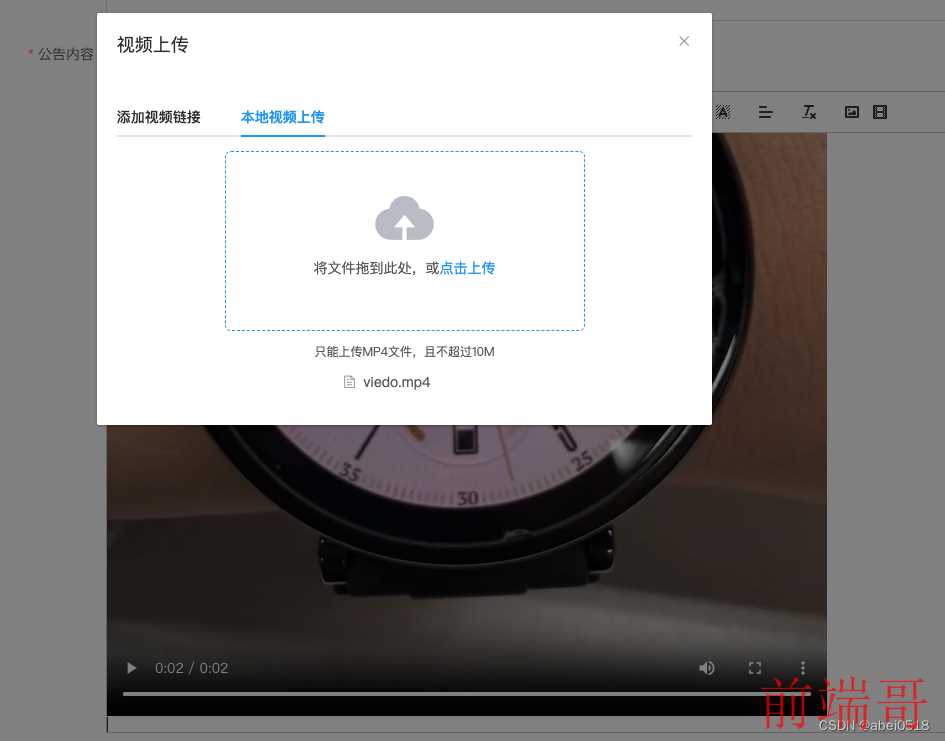
2、改造视频 精华啊精华,重点啊重点
如果想要在富文本上传本地视频,只能改在,原来的是能放一个url。视频没有办法用base64格式播放,所以只能上传到服务器,要求后端大哥给返回url。(我的大坑来自于,上传文件的接口,后端返回的是二进制流导致的)
| |
| import { Quill } from "vue-quill-editor"; |
| |
| const BlockEmbed = Quill.import('blots/block/embed') |
| const Link = Quill.import('formats/link') |
| const ATTRIBUTES = ['height', 'width'] |
| class Video extends BlockEmbed { |
| static create (value) { |
| let node = super.create() |
| |
| node.setAttribute('controls', 'controls') |
| node.setAttribute('playsinline', 'true') |
| node.setAttribute('webkit-playsinline', 'true') |
| node.setAttribute('type', 'video/mp4') |
| |
| node.setAttribute('poster', value.poster) |
| node.setAttribute('src', this.sanitize(value.url)) |
| return node |
| } |
| static formats (domNode) { |
| return ATTRIBUTES.reduce((formats, attribute) => { |
| if (domNode.hasAttribute(attribute)) { |
| formats[attribute] = domNode.getAttribute(attribute) |
| } |
| return formats |
| }, {}) |
| } |
| static sanitize (url) { |
| return Link.sanitize(url) |
| } |
| static value (domNode) { |
| |
| return { |
| url: domNode.getAttribute('src'), |
| poster: domNode.getAttribute('poster'), |
| } |
| } |
| format (name, value) { |
| if (ATTRIBUTES.indexOf(name) > -1) { |
| if (value) { |
| this.domNode.setAttribute(name, value) |
| } else { |
| this.domNode.removeAttribute(name) |
| } |
| } else { |
| super.format(name, value) |
| } |
| } |
| html () { |
| const { video } = this.value() |
| return `<a href="${video}" rel="external nofollow" rel="external nofollow" >${video}</a>` |
| } |
| } |
| Video.blotName = 'video' |
| Video.className = 'ql-video' |
| Video.tagName = 'video' |
| export default Video |
| <div> |
| <el-dialog :close-on-click-modal="false" width="50%" style="margin-top: 1px" title="视频上传" :visible.sync="videoForm.show" append-to-body> |
| <el-tabs v-model="videoForm.activeName"> |
| <el-tab-pane label="添加视频链接" name="first"> |
| <el-input v-model="videoForm.videoLink" placeholder="请输入视频链接" clearable></el-input> |
| <el-button type="primary" size="small" style="margin: 20px 0px 0px 0px " @click="insertVideoLink(videoForm.videoLink,'')">确认 |
| </el-button> |
| </el-tab-pane> |
| <el-tab-pane label="本地视频上传" name="second"> |
| <el-upload v-loading="loading" style="text-align: center;" drag :action="uploadVideoConfig.uploadUrl" accept="video/*" :name="uploadVideoConfig.name" :before-upload="onBeforeUploadVideo" :on-error="onErrorVideo" :http-request="httpRequest" :multiple="false"> |
| <i class="el-icon-upload"></i> |
| <div class="el-upload__text">将文件拖到此处,或<em>点击上传</em></div> |
| <div class="el-upload__tip" slot="tip">只能上传MP4文件,且不超过{{uploadVideoConfig.maxVideoSize}}M</div> |
| </el-upload> |
| </el-tab-pane> |
| </el-tabs> |
| </el-dialog> |
| </div> |
| |
| |
| import Video from './quill-video' |
| Quill.register(Video, true) |
| |
| data () { |
| return { |
| |
| videoForm: { |
| show: false, |
| videoLink: '', |
| activeName: 'first' |
| } |
| } |
| } |
| methods: { |
| |
| insertVideoLink (videoLink, poster, type) { |
| if (!videoLink) return this.$message.error('视频地址不能为空!') |
| this.videoForm.show = false |
| let quill = this.$refs['myQuillEditor'].quill |
| |
| let range = quill.getSelection() |
| |
| |
| let index = range ? range.index : this.range |
| |
| const img = poster ? poster : 'https://cube.elemecdn.com/6/94/4d3ea53c084bad6931a56d5158a48jpeg.jpeg' |
| if (type !== 'img') { |
| |
| quill.insertEmbed(index, 'video', { |
| url: videoLink, |
| poster: img |
| }) |
| } else { |
| quill.insertEmbed(index, 'image', videoLink) |
| } |
| |
| quill.setSelection(index + 1) |
| }, |
| |
| onBeforeUploadVideo (file) { |
| this.loading = true |
| let acceptArr = ['video/mp4'] |
| const isVideo = acceptArr.includes(file.type) |
| const isLt50M = file.size / 1024 / 1024 < this.uploadVideoConfig.maxVideoSize |
| if (!isVideo) { |
| this.hideLoading() |
| this.$message.error('只能上传mp4格式文件!') |
| } |
| if (!isLt50M) { |
| this.hideLoading() |
| this.$message.error(`上传文件大小不能超过 ${this.uploadVideoConfig.maxVideoSize}MB!`) |
| } |
| return isLt50M && isVideo |
| }, |
| |
| onErrorVideo () { |
| this.hideLoading() |
| this.$message.error('上传失败') |
| }, |
| |
| httpRequest(file) { |
| const formData = new FormData() |
| formData.append('file', file.file) |
| formData.append('businessTableName', this.businessTableName) |
| formData.append('systemFlag', process.env.VUE_APP_SYSTEMKEY) |
| requestApi('uploadFiles', formData).then(res => { |
| if (res) { |
| this.hideLoading() |
| this.insertVideoLink(res.url) |
| } else { |
| this.$message.error(res.desc) |
| } |
| }) |
| }, |
| } |
效果

保存后编辑回显都没问题
<p class="ql-indent-8">这是一个公告</p><p> <strong>我要介绍一下我的身份证背面长什么样子,它应该是居中的才对,如果没有,在调整一下</strong><strong style="background-color: rgb(230, 0, 0);">吧就</strong></p><p> <img src="我是url不方便展示.jpeg" width="223"></p><p><br></p><p> 还有一个视频,总是获取不到光标的位置吗,总是跑到第一个位置去,很费劲</p><p> </p><video class="ql-video" controls="controls" playsinline="true" webkit-playsinline="true" type="video/mp4" poster="我是url不方便展示.jpeg" src="我是url不方便展示.mp4"></video><p><br></p>
我知道你很急但是你别急的完整代码
| |
| <!--富文本编辑器--> |
| <template> |
| <div class="rich-text-editor-container" v-loading="loading"> |
| <div class="preview-editor"> |
| <el-button type="success" plain @click="dialogFormVisible = true">预览</el-button> |
| <div class="preview-box" v-if="dialogFormVisible"> |
| <i class="iconfont icon-icon_close close-preview" @click="dialogFormVisible = false"></i> |
| <div class="preview-content" v-html="value"></div> |
| </div> |
| </div> |
| <quill-editor :content="content" :options="editorOptions" class="ql-snow ql-editor" ref="myQuillEditor" @change="onEditorChange($event)"> |
| </quill-editor> |
| |
| <div> |
| <el-dialog :close-on-click-modal="false" width="50%" style="margin-top: 1px" title="视频上传" :visible.sync="videoForm.show" append-to-body> |
| <el-tabs v-model="videoForm.activeName"> |
| <el-tab-pane label="添加视频链接" name="first"> |
| <el-input v-model="videoForm.videoLink" placeholder="请输入视频链接" clearable></el-input> |
| <el-button type="primary" size="small" style="margin: 20px 0px 0px 0px " @click="insertVideoLink(videoForm.videoLink,'')">确认 |
| </el-button> |
| </el-tab-pane> |
| <el-tab-pane label="本地视频上传" name="second"> |
| <el-upload v-loading="loading" style="text-align: center;" drag :action="uploadVideoConfig.uploadUrl" accept="video/*" :name="uploadVideoConfig.name" :before-upload="onBeforeUploadVideo" :on-error="onErrorVideo" :http-request="httpRequest" :multiple="false"> |
| <i class="el-icon-upload"></i> |
| <div class="el-upload__text">将文件拖到此处,或<em>点击上传</em></div> |
| <div class="el-upload__tip" slot="tip">只能上传MP4文件,且不超过{{uploadVideoConfig.maxVideoSize}}M</div> |
| </el-upload> |
| </el-tab-pane> |
| </el-tabs> |
| </el-dialog> |
| </div> |
| |
| <el-upload |
| class="avatar-uploader" |
| action="" |
| :show-file-list="false" |
| :http-request="httpRequest1" |
| :before-upload="beforeUpload" |
| > |
| </el-upload> |
| </div> |
| </template> |
| <script> |
| import { requestApi } from '@/api' |
| import { quillEditor, Quill } from 'vue-quill-editor' |
| import { ImageDrop } from 'quill-image-drop-module' |
| import ImageResize from 'quill-image-resize-module' |
| |
| |
| var sizes = [false, "16px", "18px", "20px", "22px", "26px", "28px", "30px"]; |
| var Size = Quill.import("formats/size"); |
| Size.whitelist = sizes; |
| |
| Quill.register('modules/imageDrop', ImageDrop); |
| Quill.register('modules/imageResize', ImageResize); |
| |
| import Video from './quill-video' |
| Quill.register(Video, true) |
| |
| import { setQuillTitle } from './quill-title.js' |
| |
| const toolbarOptions = [ |
| ["bold", "italic", "underline", "strike"], |
| ["blockquote", "code-block"], |
| [{ list: "ordered" }, { list: "bullet" }], |
| [{ indent: "-1" }, { indent: "+1" }], |
| [{ size: sizes }], |
| [{ header: [1, 2, 3, 4, 5, 6, false] }], |
| [{ color: [] }, { background: [] }], |
| [{ align: [] }], |
| ["clean"], |
| ['image', 'video'] |
| ] |
| export default { |
| name: 'editor', |
| components: { |
| quillEditor |
| }, |
| props: { |
| |
| content: { |
| type: String, |
| default: '' |
| }, |
| businessTableName: { |
| type: String, |
| default: '' |
| }, |
| |
| uploadVideoConfig: { |
| type: Object, |
| default () { |
| return { |
| uploadUrl: '', |
| maxVideoSize: 50, |
| maxSize: 50, |
| name: 'Filedata' |
| } |
| } |
| } |
| }, |
| data () { |
| let _self = this; |
| return { |
| dialogFormVisible: false, |
| value: '', |
| range: 0, |
| loading: false, |
| editorOptions: { |
| placeholder: '', |
| theme: 'snow', |
| modules: { |
| imageDrop: true, |
| imageResize: { |
| displayStyles: { |
| backgroundColor: "black", |
| border: "none", |
| color: "white" |
| }, |
| modules: ["Resize", "DisplaySize", "Toolbar"] |
| }, |
| toolbar: { |
| container: toolbarOptions, |
| handlers: { |
| 'video': () => { |
| |
| _self.videoForm.show = true |
| this.range = this.$refs.myQuillEditor.quill.selection.savedRange.index |
| }, |
| 'image': (value) => { |
| document.querySelector('.avatar-uploader input').click() |
| this.range = this.$refs.myQuillEditor.quill.selection.savedRange.index |
| } |
| } |
| } |
| } |
| }, |
| |
| videoForm: { |
| show: false, |
| videoLink: '', |
| activeName: 'first' |
| } |
| } |
| }, |
| mounted () { |
| |
| setQuillTitle() |
| this.value = this.content |
| }, |
| methods: { |
| |
| onEditorChange ({ quill, html, text }) { |
| |
| |
| this.value = html |
| this.$emit('update:content', html) |
| this.$emit('change', html) |
| }, |
| hideLoading () { |
| this.loading = false |
| }, |
| |
| insertVideoLink (videoLink, poster, type) { |
| if (!videoLink) return this.$message.error('视频地址不能为空!') |
| this.videoForm.show = false |
| let quill = this.$refs['myQuillEditor'].quill |
| |
| let range = quill.getSelection() |
| |
| let index = range ? range.index : this.range |
| |
| const img = poster ? poster : 'https://cube.elemecdn.com/6/94/4d3ea53c084bad6931a56d5158a48jpeg.jpeg' |
| if (type !== 'img') { |
| |
| quill.insertEmbed(index, 'video', { |
| url: videoLink, |
| poster: img |
| }) |
| } else { |
| quill.insertEmbed(index, 'image', videoLink) |
| } |
| |
| quill.setSelection(index + 1) |
| }, |
| |
| onBeforeUploadVideo (file) { |
| this.loading = true |
| let acceptArr = ['video/mp4'] |
| const isVideo = acceptArr.includes(file.type) |
| const isLt50M = file.size / 1024 / 1024 < this.uploadVideoConfig.maxVideoSize |
| if (!isVideo) { |
| this.hideLoading() |
| this.$message.error('只能上传mp4格式文件!') |
| } |
| if (!isLt50M) { |
| this.hideLoading() |
| this.$message.error(`上传文件大小不能超过 ${this.uploadVideoConfig.maxVideoSize}MB!`) |
| } |
| return isLt50M && isVideo |
| }, |
| |
| onSuccessVideo (res) { |
| this.hideLoading() |
| if (res.code === '100') { |
| this.insertVideoLink(res.url, res.cover) |
| } else { |
| this.$message.error(res.desc) |
| } |
| }, |
| |
| onErrorVideo () { |
| this.hideLoading() |
| this.$message.error('上传失败') |
| }, |
| |
| httpRequest(file) { |
| const formData = new FormData() |
| formData.append('file', file.file) |
| formData.append('businessTableName', this.businessTableName) |
| formData.append('systemFlag', process.env.VUE_APP_SYSTEMKEY) |
| requestApi('uploadVideo', formData).then(res => { |
| if (res) { |
| this.hideLoading() |
| this.insertVideoLink(res.url, null, 'img') |
| } else { |
| this.$message.error(res.desc) |
| } |
| }) |
| }, |
| |
| httpRequest1(file) { |
| const formData = new FormData() |
| formData.append('file', file.file) |
| formData.append('businessTableName', this.businessTableName) |
| formData.append('systemFlag', process.env.VUE_APP_SYSTEMKEY) |
| requestApi('uploadVideo', formData).then(res => { |
| if (res) { |
| this.hideLoading() |
| this.insertVideoLink(res.url, null, 'img') |
| } else { |
| this.$message.error(res.desc) |
| } |
| }) |
| }, |
| |
| beforeUpload(file) { |
| const isJPG = |
| file.type === "image/jpeg" || |
| file.type === "image/png" || |
| file.type === "image/jpg" || |
| file.type === "image/gif"; |
| const isLt10M = file.size / 1024 / 1024 < this.uploadVideoConfig.maxSize |
| if (!isJPG) { |
| this.$message.error("上传图片只能是 png、gif、jpeg、jpg 格式!"); |
| } else if (!isLt10M) { |
| this.$message.error(`上传图片大小不能超过${this.uploadVideoConfig.maxSize}MB!`); |
| } |
| return isJPG && isLt10M; |
| } |
| } |
| } |
| </script> |
| <style lang='scss'> |
| @import "./font.css"; |
| |
| .rich-text-editor-container .ql-container { |
| height: 600px; |
| } |
| .rich-text-editor-container .ql-editor { |
| padding: 0; |
| } |
| .rich-text-editor-container .ql-tooltip { |
| left: 5px !important; |
| } |
| .preview-editor{ |
| .preview-box{ |
| width: 100vw; |
| height: 100vh; |
| position: fixed; |
| left: 0; |
| top: 0; |
| background: rgba(0,0,0,.3); |
| display: flex; |
| flex-direction: row; |
| justify-content: center; |
| align-items: center; |
| z-index: 111111111; |
| .close-preview{ |
| position: absolute; |
| right: 20px; |
| top: 20px; |
| color: #fff; |
| cursor: pointer; |
| } |
| .preview-content{ |
| background: #fff; |
| width: calc(390px - 16px); |
| height: calc(844px - 80px); |
| overflow: auto; |
| border-radius: 50px; |
| padding: 60px 8px 20px 8px; |
| } |
| } |
| } |
| .ql-video{ |
| max-width: 100%; |
| } |
| img{ |
| max-width: 100%; |
| } |
| </style> |
| |
| |
| <editor :content="form.content" v-model="form.content"/> |
| components: { |
| Editor: () => import('@/components/editor.vue'), |
| }, |
总结
我是因为文件上传后端返回的是二进制流,不然也不会卡很久,以为自己改造的不对,所以卡了很久。其实已经有很多很好的文档来告诉我们怎么使用了。我看了这几个文档,放个地址大家也看看
https://blog.csdn.net/Memory_888/article/details/128495158
https://www.jb51.net/javascript/285852osd.htm
https://blog.csdn.net/m0_46693606/article/details/119040208
除了这些还有好多好多,这是我参考的几个不错的文档。希望我的这些对各位的开发有所帮助。
后续补充内容
- 文字居中
| |
| const Align = Quill.import('attributors/style/align'); |
| Align.whitelist = ['right', 'center', 'justify']; |
| Quill.register(Align, true); |
- 首行缩进
| |
| |
| |
| .ql-indent-1 { |
| padding-left: 0px !important; |
| text-indent: 1em !important; |
| } |
| |
| .ql-indent-2 { |
| padding-left: 0px !important; |
| text-indent: 2em !important; |
| } |
| |
| .ql-indent-3 { |
| padding-left: 0px !important; |
| text-indent: 3em !important; |
| } |
| |
| .ql-indent-4 { |
| padding-left: 0px !important; |
| text-indent: 4em !important; |
| } |
| |
| .ql-indent-5 { |
| padding-left: 0px !important; |
| text-indent: 5em !important; |
| } |
| |
| .ql-indent-6 { |
| padding-left: 0px !important; |
| text-indent: 6em !important; |
| } |
| |
| .ql-indent-7 { |
| padding-left: 0px !important; |
| text-indent: 7em !important; |
| } |
| |
| .ql-indent-8 { |
| padding-left: 0px !important; |
| text-indent: 8em !important; |
| } |


