一、目录

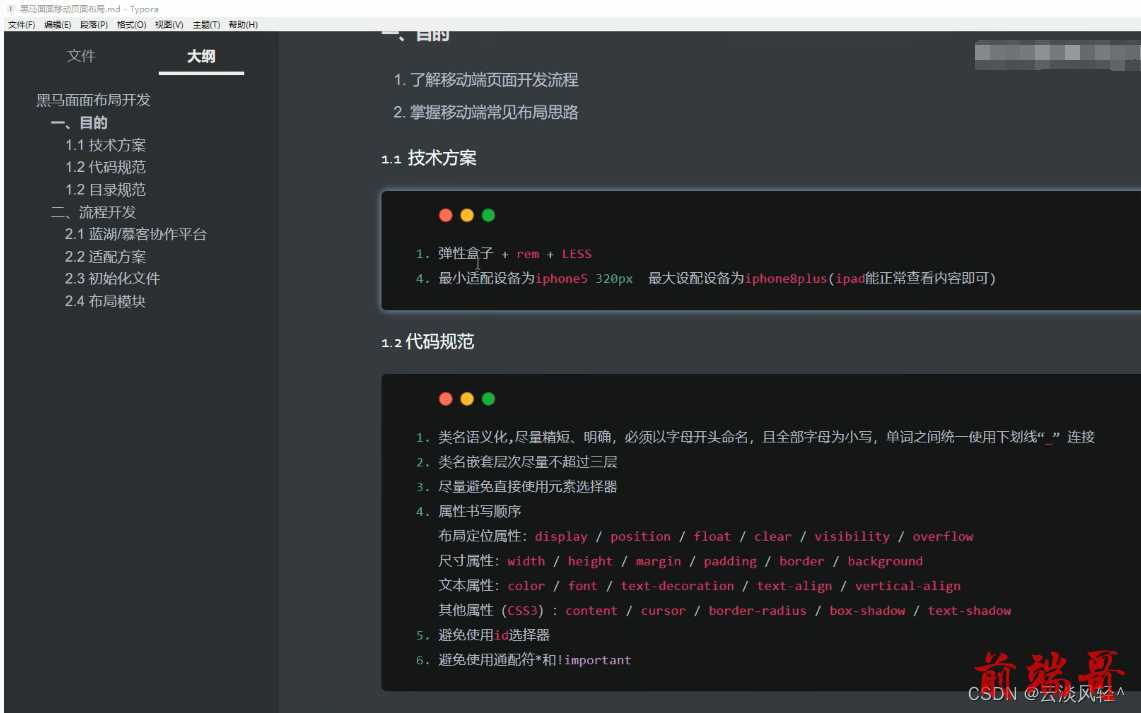
二、黑马面面项目的规范要求


三、黑马面面项目准备工作
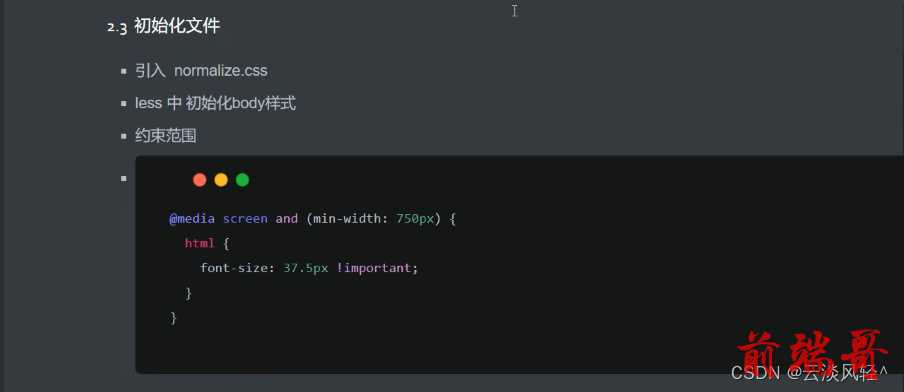
设置基准值为37.5

四、黑马面面项目制作
1.黑马面面项目主要步骤
- wrap大模块(header和nav模块制作,go模块制作)
- content大模块(con-hd布局,旋转木马轮播图模块)
- 充电学习模块(con-hd,充电学习轮播图模块)
- footer底部模块
2.swiper插件的基本使用

下载swiper插件

swiper的基本使用

 swiper根据需求定制silde


swiper根据需求定制左右箭头


本项目不需要分页器,所以删除分页器相应代码


利用swiper定制充电学习模块轮播图


实现代码
index.html
<!DOCTYPE html> <html lang="en"> <head> <meta charset="UTF-8"> <meta http-equiv="X-UA-Compatible" content="IE=edge"> <meta name="viewport" content="width=device-width, initial-scale=1.0"> <title>黑马面面</title> <link rel="stylesheet" href="./css/normalize.css"> <!-- 先引入css文件 放到自己css文件的上面 --> <link rel="stylesheet" href="./css/swiper.min.css"> <link rel="stylesheet" href="./css/index.css"> </head> <body> <section class="wrap"> <!-- 头部区域 --> <header class="header">黑马面面</header> <!-- 导航栏部分 --> <nav class="nav"> <!-- a{$}*6 --> <a href="#" class="item"> <img src="./icons/icon1.png" alt=""> <span>HR面试</span> </a> <a href="#" class="item"> <img src="./icons/icon2.png" alt=""> <span>笔试</span> </a> <a href="#" class="item"> <img src="./icons/icon3.png" alt=""> <span>技术面试</span> </a> <a href="#" class="item"> <img src="./icons/icon4.png" alt=""> <span>模拟面试</span> </a> <a href="#" class="item"> <img src="./icons/icon5.png" alt=""> <span>面试技巧</span> </a> <a href="#" class="item"> <img src="./icons/icon6.png" alt=""> <span>薪资查询</span> </a> </nav> <!-- go模块 --> <section class="go"> <img src="./images/go.png" alt=""> </section> </section> <!-- 就业指导模块 --> <section class="content"> <!-- 头部 --> <div class="con-hd"> <h4> <span class="icon"> <img src="./icons/i2.png" alt=""> </span> 就业指导 </h4> <a href="#" class="more">更多>></a> </div> <!-- 旋转木马轮播图模块 --> <div class="get_job_focus"> <!-- Swiper --> <div class="swiper-container get_job_fo"> <div class="swiper-wrapper"> <div class="swiper-slide"> <!-- a>img --> <a href="#"><img src="./images/pic.png" alt=""></a> <p>老师教你应对面试技巧</p> </div> <div class="swiper-slide"> <!-- a>img --> <a href="#"><img src="./images/pic.png" alt=""></a> <p>老师教你应对面试技巧</p> </div> <div class="swiper-slide"> <!-- a>img --> <a href="#"><img src="./images/pic.png" alt=""></a> <p>老师教你应对面试技巧</p> </div> </div> <!-- 这个是分页器小圆点样式 我们不需要 --> <!-- Add Pagination --> <!-- <div class="swiper-pagination"></div> --> <!-- 这两个箭头我们不能定位移动出来 因为这个container包含了overflow:hidden的 会溢出隐藏 --> <!-- 所以我们把箭头拿出container外 --> </div> <!-- 根据需求把这个代码放到container外面 --> <!-- Add Arrows 添加左右箭头--> <div class="swiper-button-next"></div> <div class="swiper-button-prev"></div> </div> </section> <!-- 充电学习模块 --> <section class="content"> <!-- 头部 --> <div class="con-hd"> <h4> <span class="icon"> <img src="./icons/i2.png" alt=""> </span> 就业指导 </h4> <a href="#" class="more">更多>></a> </div> <!-- 学习模块轮播图模块 --> <div class="study"> <!-- Swiper --> <div class="swiper-container study_fo"> <div class="swiper-wrapper"> <div class="swiper-slide"> <img src="./images/pic1.png" alt=""> <h5>说低调英语,告别中式英语</h5> <p>156人学习</p> </div> <div class="swiper-slide"> <img src="./images/pic2.png" alt=""> <h5>说低调英语,告别中式英语</h5> <p>156人学习</p> </div> <div class="swiper-slide"> <img src="./images/pic1.png" alt=""> <h5>说低调英语,告别中式英语</h5> <p>156人学习</p> </div> <div class="swiper-slide"> <img src="./images/pic1.png" alt=""> <h5>说低调英语,告别中式英语</h5> <p>156人学习</p> </div> </div> <!-- Add Pagination --> <div class="swiper-pagination"></div> </div> </div> </section> <footer class="footer"> <a href="#" class="item"> <img src="./icons/home.png" alt=""> <p>首页</p> </a> <a href="#" class="item"> <img src="./icons/ms.png" alt=""> <p>模拟面试</p> </a> <a href="#" class="item"> <img src="./icons/net.png" alt=""> <p>技术面试</p> </a> <a href="#" class="item"> <img src="./icons/user.png" alt=""> <p>我的首页</p> </a> </footer> <script src="./js/flexible.js"></script> <!-- 必须引入js文件 --> <script src="./js/swiper.min.js"></script> <script> // 第一个函数里面是 就业指导轮播图 // 这个函数叫自调用函数(立即执行函数)(沙箱函数) (function () { var swiper = new Swiper('.swiper-container', { // 能够显示的slide(轮播图)的个数 slidesPerView: 2, // 每一个slide之间的距离 spaceBetween: 30, // 它的意思是让当前最大的轮播图在中间显示 它默认是贴左边来显示的 centeredSlides: true, loop: true, // 当前不需要分页器小圆点样式 // pagination: { // el: '.swiper-pagination', // clickable: true, // }, // 添加左右箭头 navigation: { nextEl: ".swiper-button-next", prevEl: ".swiper-button-prev", }, }); })(); // 第二个函数的轮播图 (function () { // 如果有多个轮播图最好修改一下swiper-container var swiper = new Swiper(".study_fo", { // 我们可以看到的是两个半 slidesPerView: 2.2, spaceBetween: 20, }); })(); </script> </body> </html>
css
1.normalize.css
2.swiper.min.css
3.index.less


js
1.flexible.js
2.swiper.min.js


